Admin guide

Use-case instructions for the Kutab admin panel — the screen to open, the decision to make, and the checks that prevent schedule or billing mistakes.

10 guides

Admin > Subjects, then Admin > Packages

Add subjects and packages

Build the catalog that subscriptions, learning material, schedules, and billing depend on.

Use when

Use this before selling a new program or opening a new course track.

Expected outcome

Parents can subscribe to a clear package, and admins can connect lectures and materials to the right subject.

Steps

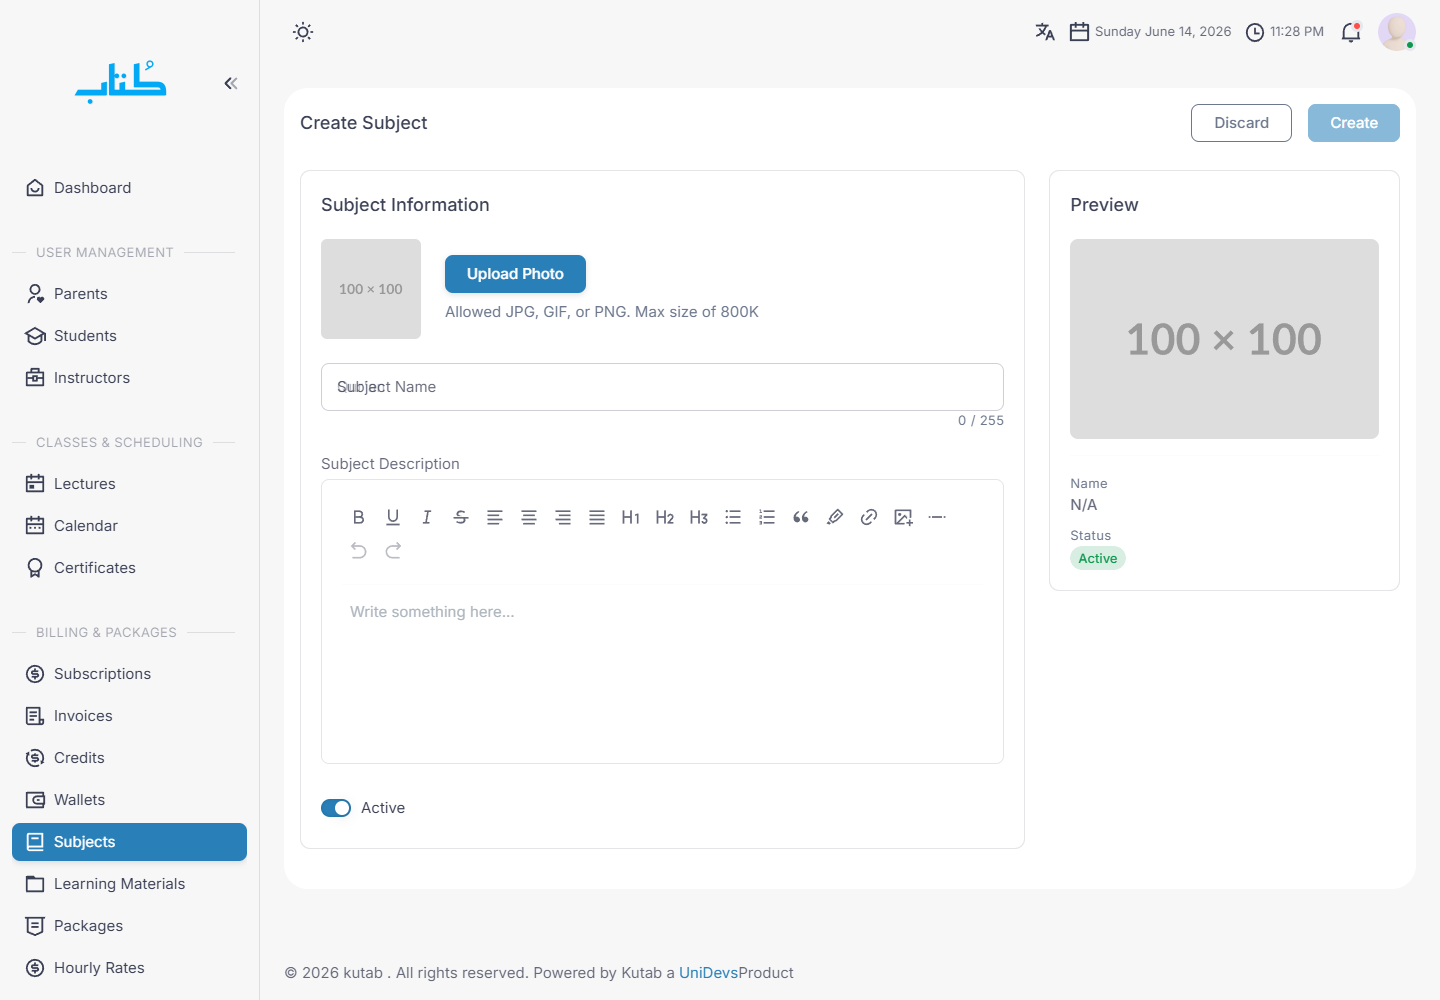
  1. Open Subjects and create the learning area first. A subject is the academic category, such as Quran, Arabic, or Math.
  2. Enter a clear subject name and description. Keep the name short because it appears in filters, packages, and learning material screens.
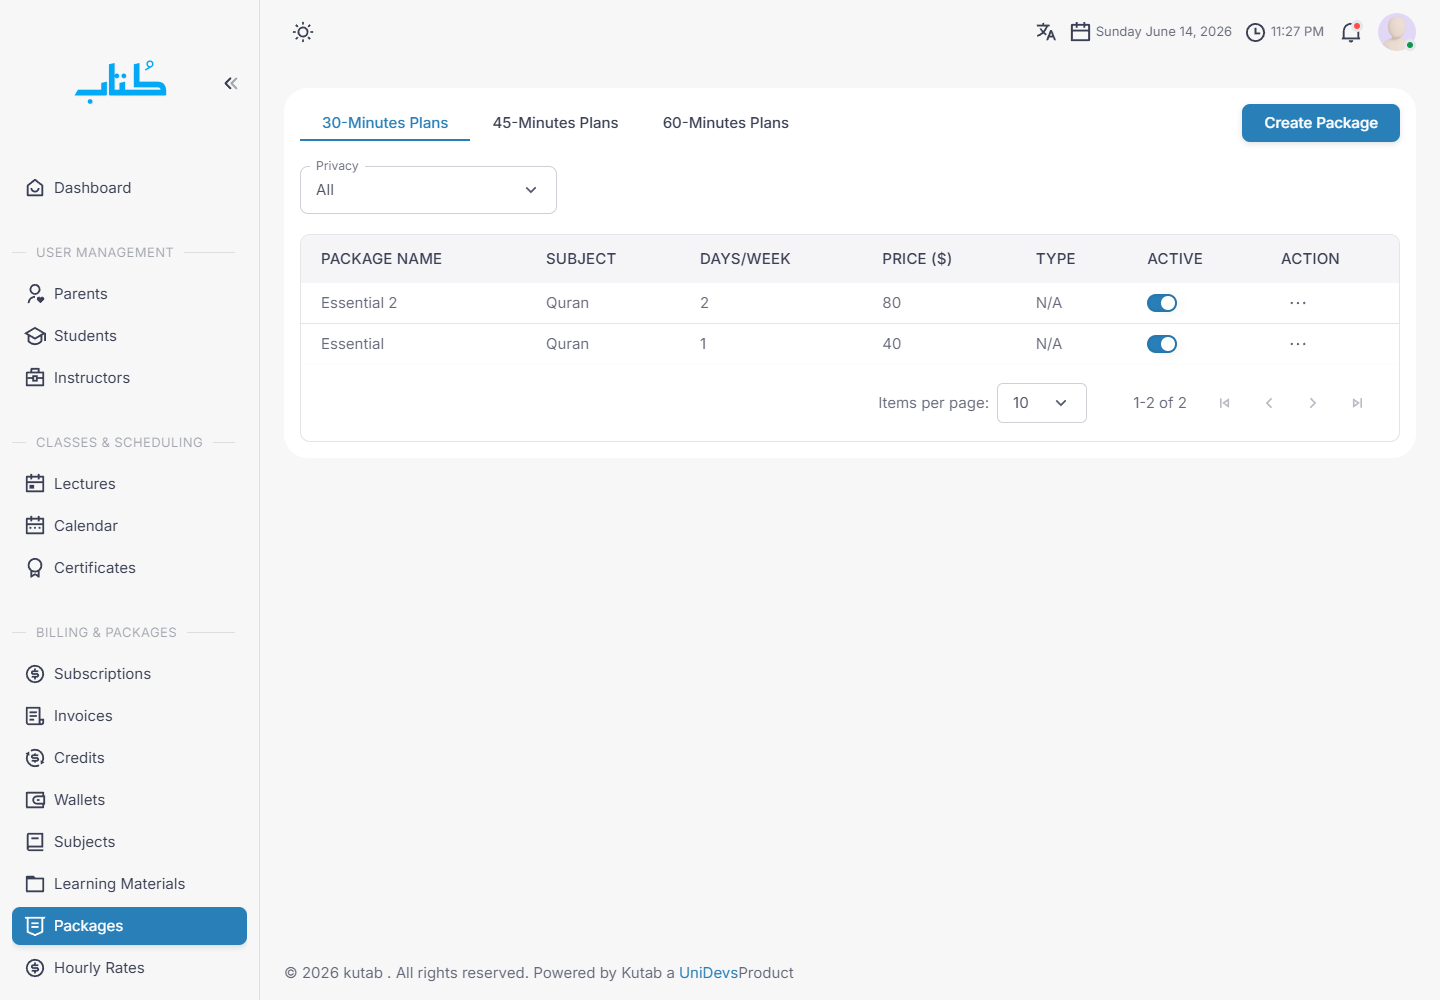
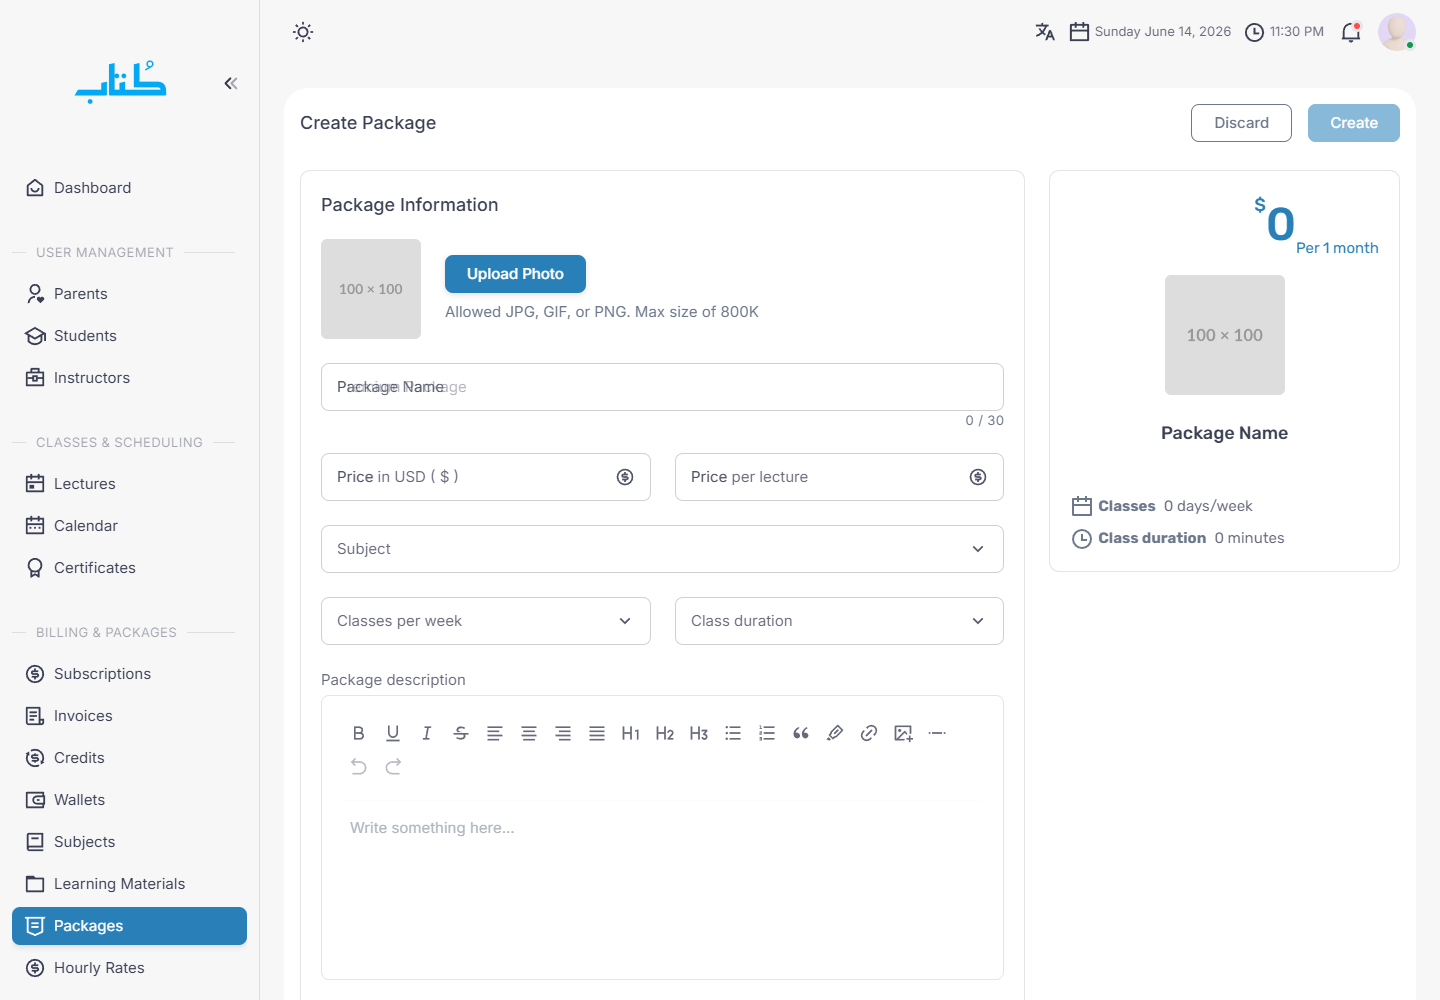
  3. Open Packages after the subject exists. A package is the purchasable offer: price, duration, renewal term, lecture frequency, and lecture duration.
  4. Choose the correct duration tab, create the package, connect it to the subject, and confirm price, renewal, lectures per week, and class duration before saving.

Checks

  • Create subjects before packages so package setup has the right academic category.
  • Use packages for commercial rules, not for folders or study files.
  • Review renewal and lecture duration carefully because subscriptions inherit these values.
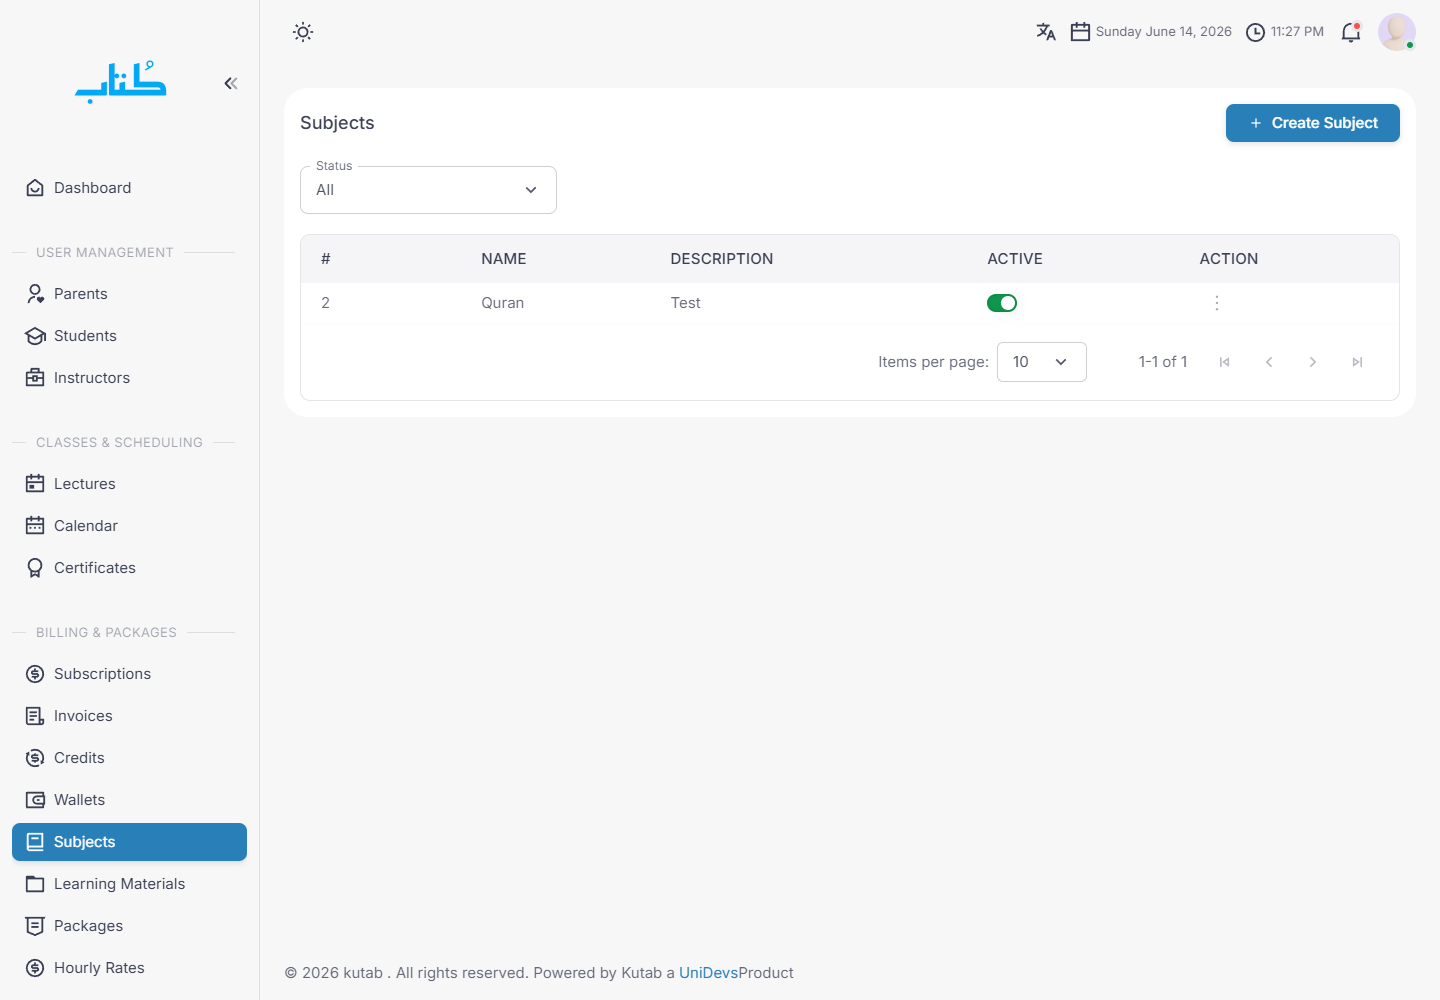
demo.kutab.unidevs.co/admin/subjects
Admin subjects list
Look for Subjects are the academic catalog.
demo.kutab.unidevs.co/admin/subjects/create
Create subject form
Look for Create the subject before package setup.
demo.kutab.unidevs.co/admin/packages
Admin packages list
Look for Packages are grouped by duration.
demo.kutab.unidevs.co/admin/packages/create
Create package form
Look for Package rules drive subscription setup.
Admin > Instructors

Manage instructors and set timetables

Create instructor accounts and define when each instructor can teach.

Use when

Use this when onboarding a teacher, changing availability, or preparing to assign students.

Expected outcome

Schedulers can match students to instructors without guessing availability or timezone.

Steps

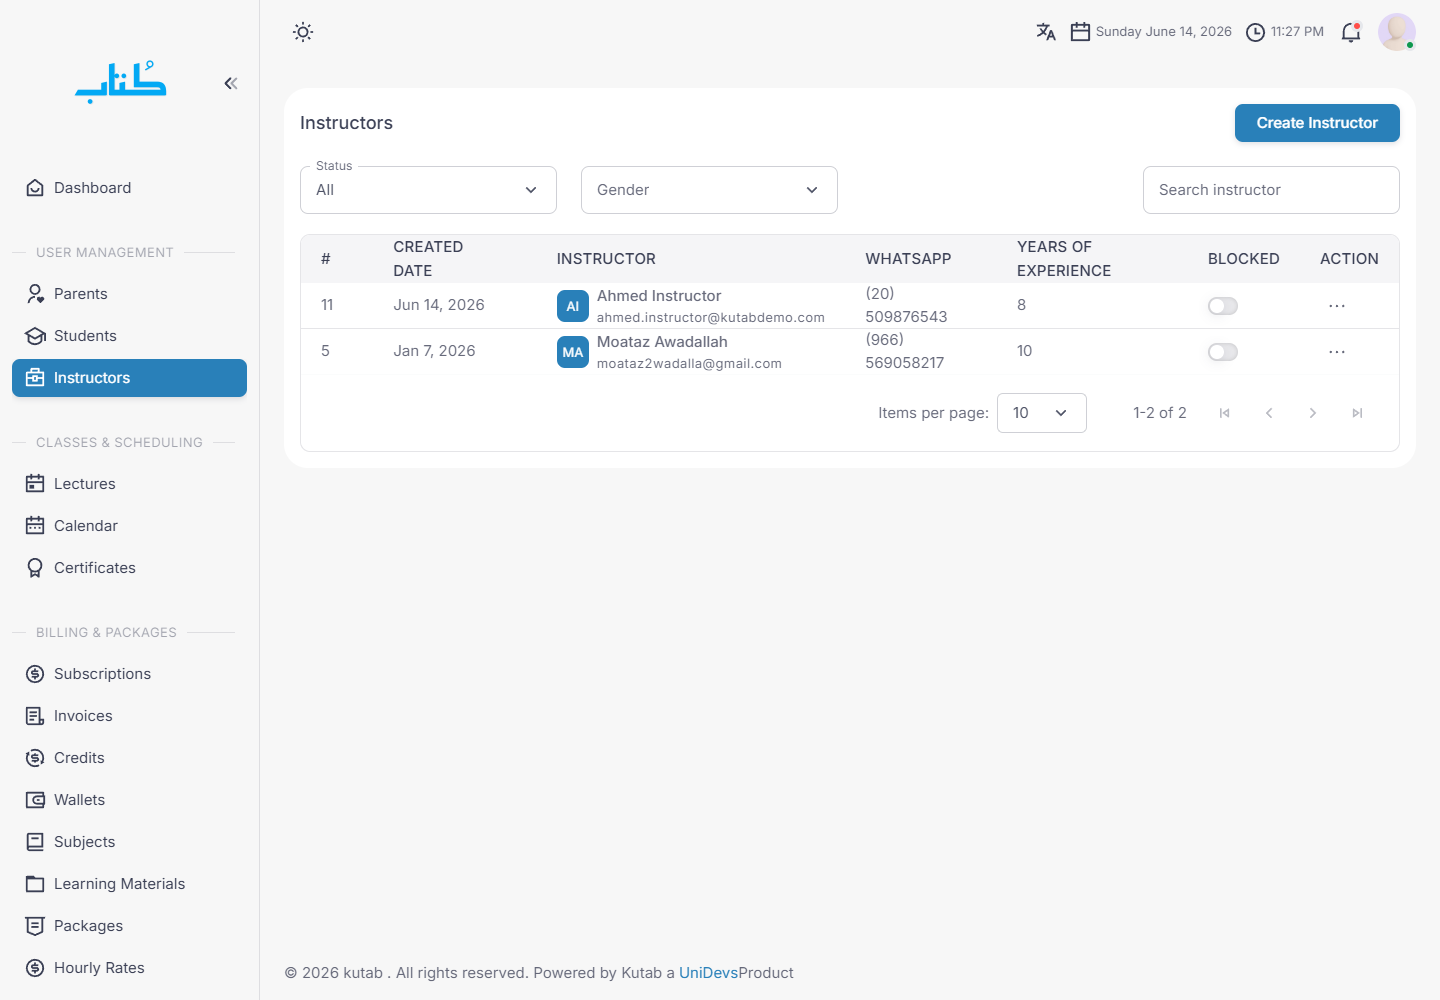
  1. Open Instructors to review current teachers, account status, and row actions.
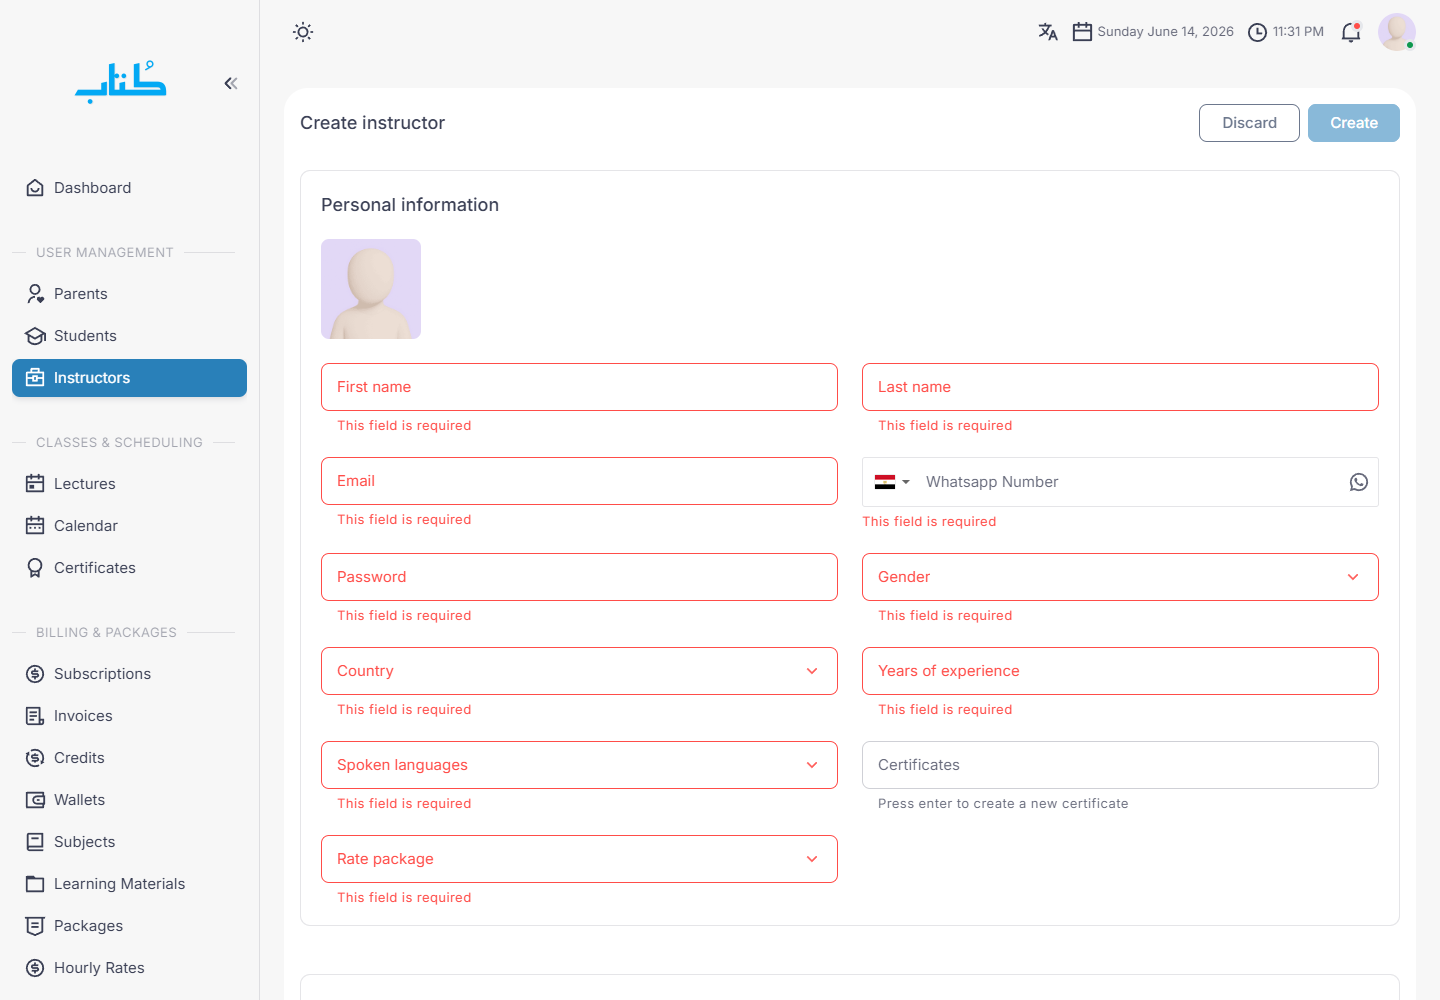
  2. Create the instructor profile with the teacher name, contact details, timezone, and account information.
  3. Open the instructor details page from the row action menu after creation.
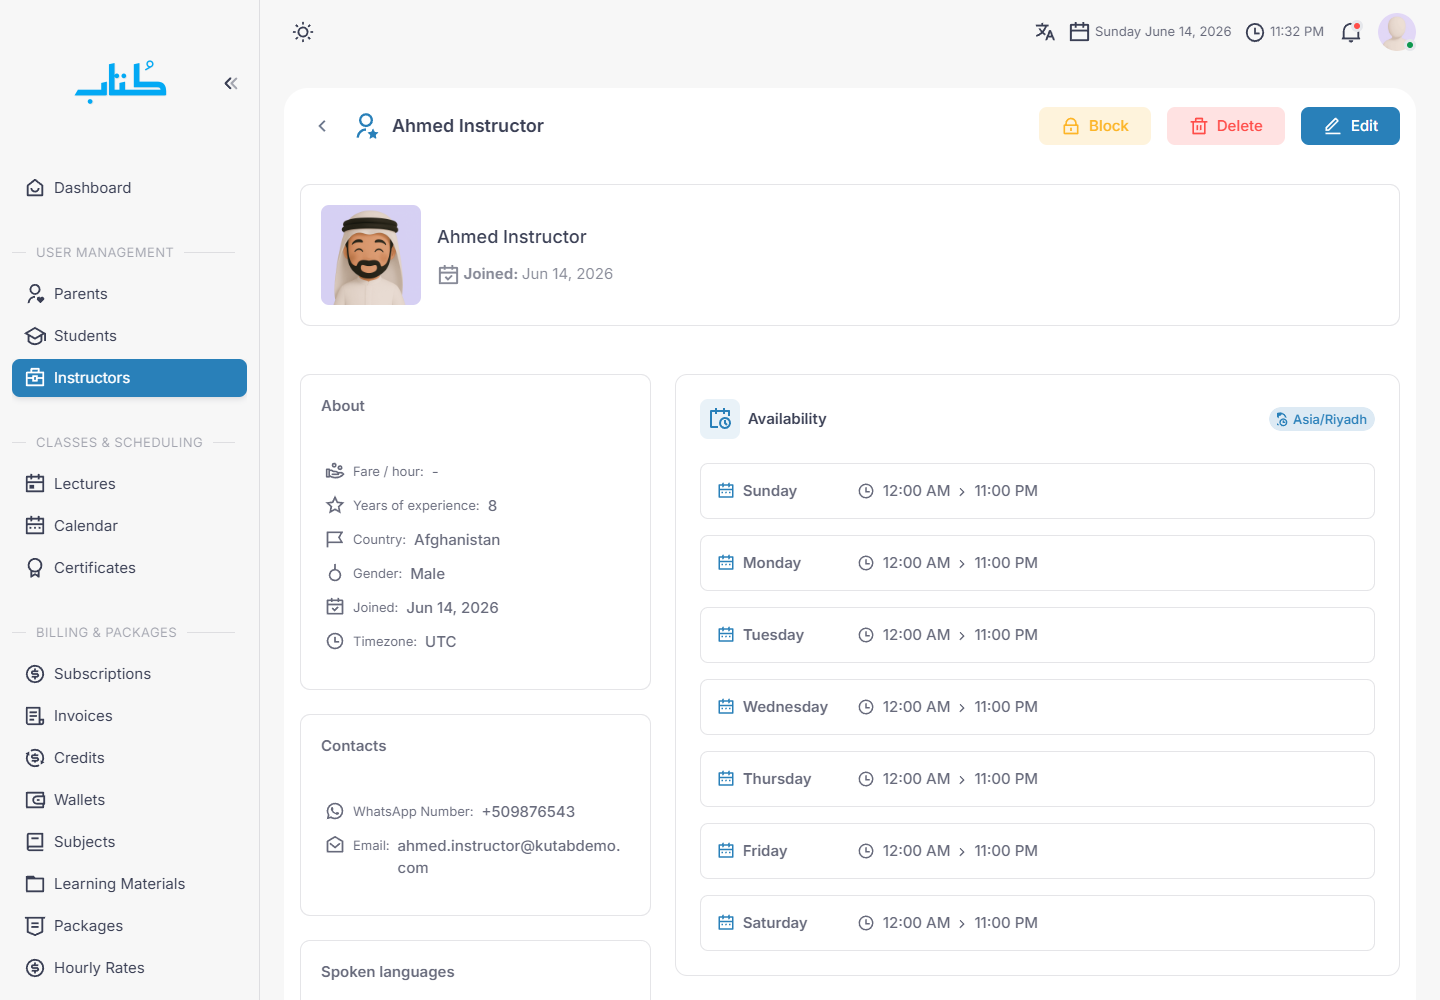
  4. Review the timetable section. Confirm available weekdays, start/end windows, and timezone before assigning subscriptions.

Checks

  • Availability should be set before subscription schedules are generated.
  • Timezone matters: the same displayed hour can mean a different UTC slot for students in another country.
  • If a teacher cannot be selected during scheduling, check the timetable first.
demo.kutab.unidevs.co/admin/instructors
Admin instructors list
Look for Review instructors and row actions.
demo.kutab.unidevs.co/admin/instructors/create
Create instructor form
Look for Create the teacher account.
demo.kutab.unidevs.co/admin/instructors/1
Instructor detail with availability timetable
Look for Confirm the teaching timetable.
Admin > Subscriptions

Manage subscriptions and schedules

Connect a student, package, instructor, and recurring schedule into one active subscription.

Use when

Use this after a parent buys a package or when a coordinator needs to adjust a student schedule.

Expected outcome

The subscription has the right package and generated classes appear on the lecture list and calendar.

Steps

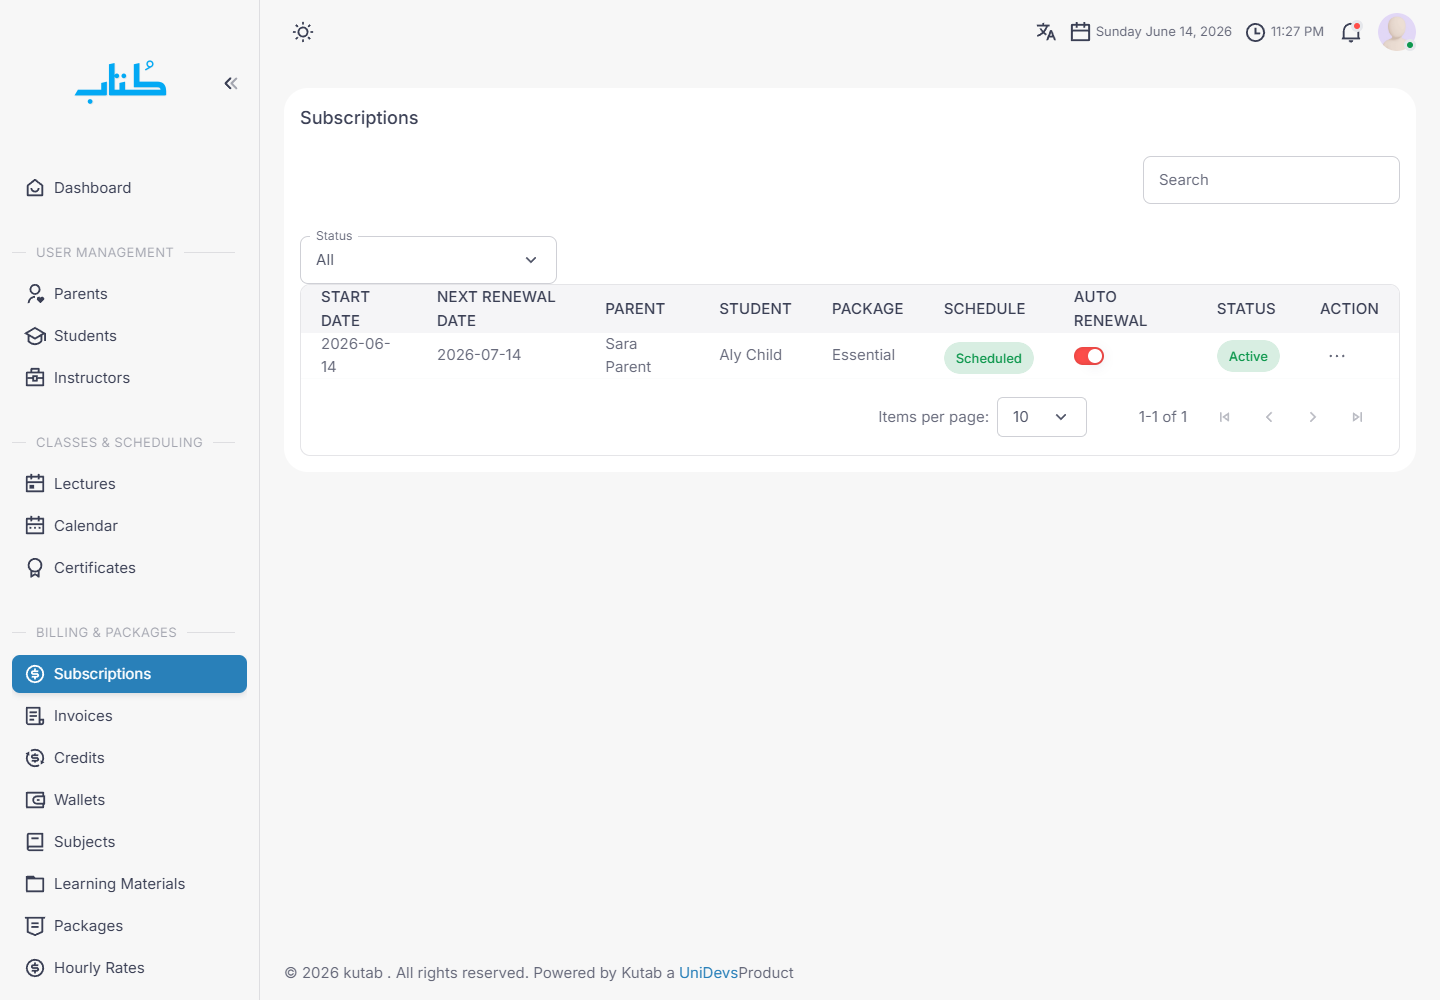
  1. Open Subscriptions and use filters or search to find the student or parent.
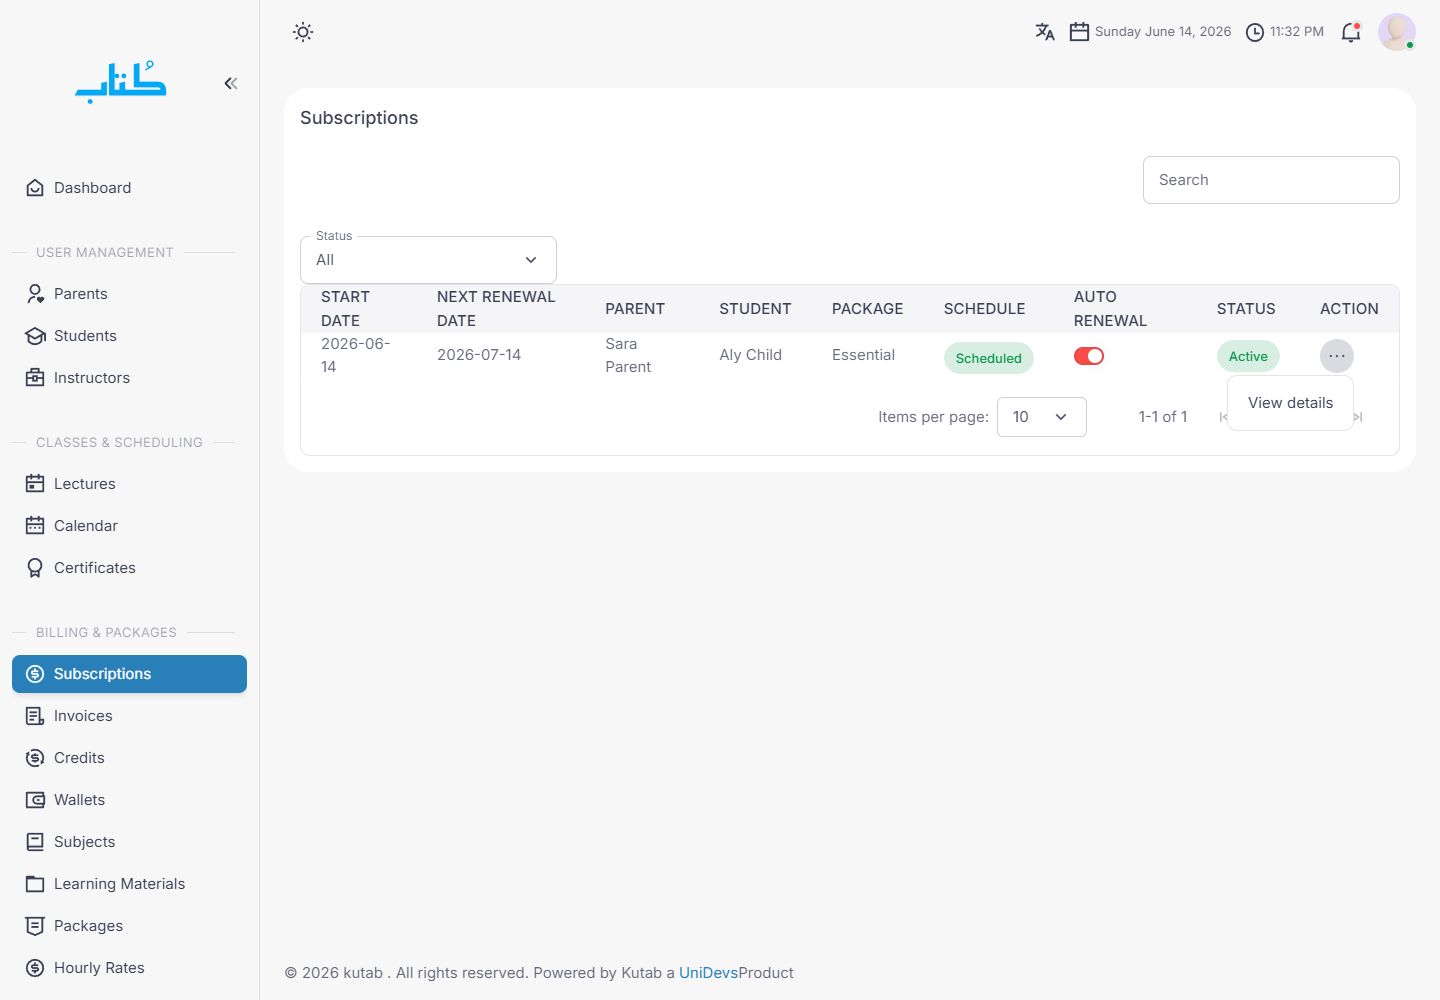
  2. Open the subscription actions menu and view the subscription details.
  3. Review student, parent, instructor, package, renewal status, and payment context.
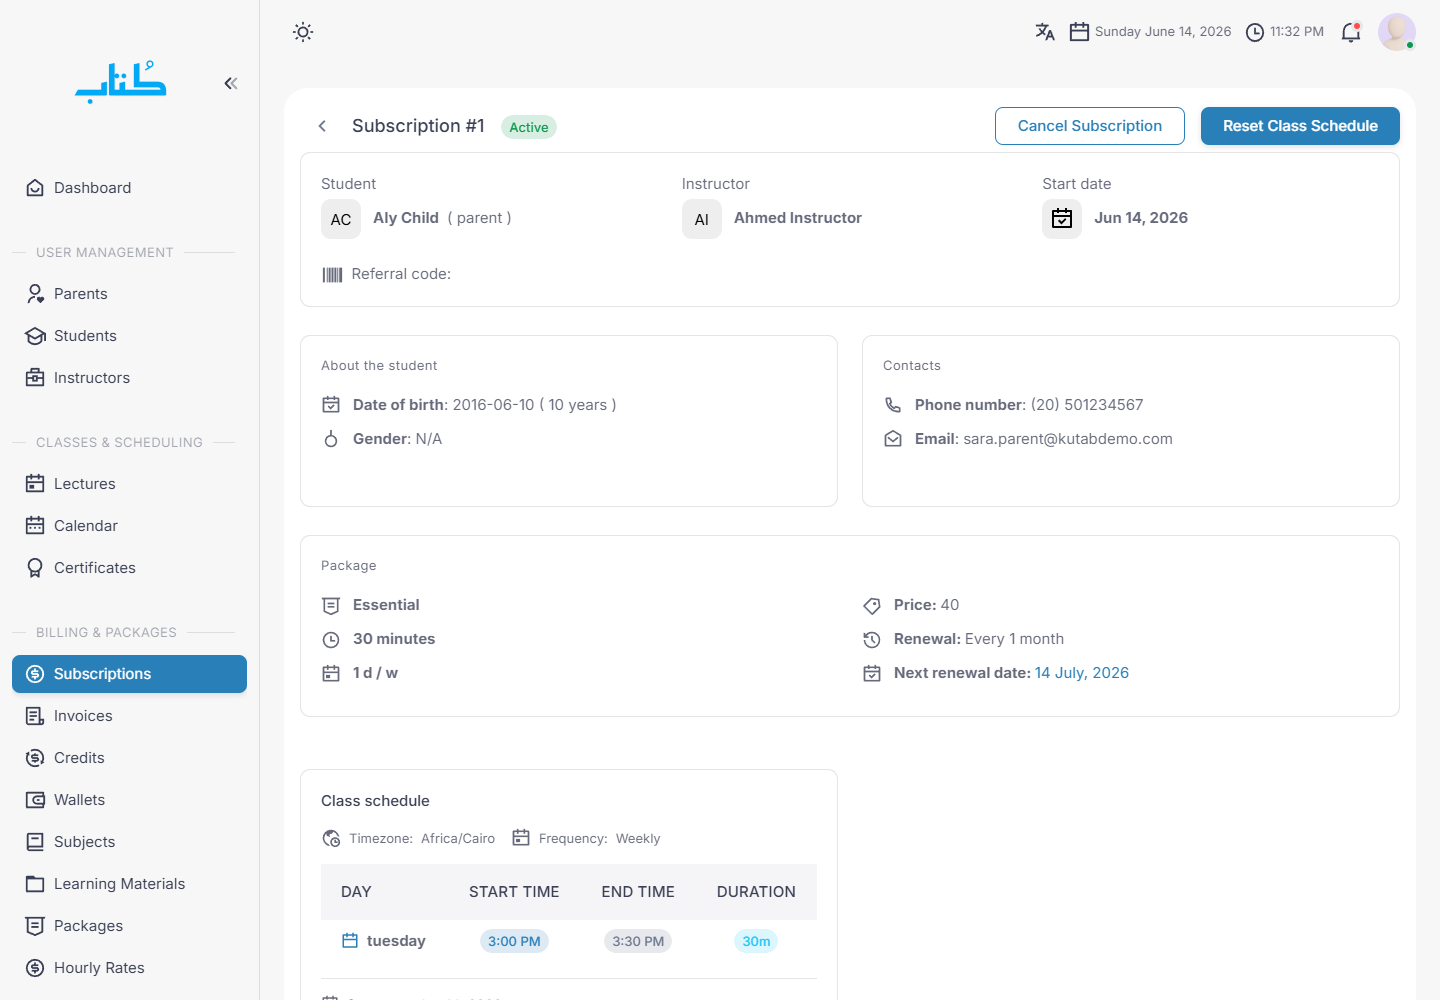
  4. In the Class schedule section, confirm frequency, day, start time, end time, duration, and timezone.
  5. Use Reset Class Schedule only when the recurring class pattern should be regenerated from the saved schedule.

Checks

  • Confirm the instructor timetable before resetting a schedule.
  • Check the timezone before deciding a class is at the wrong time.
  • If lectures are missing, inspect the subscription details before creating manual classes.
demo.kutab.unidevs.co/admin/subscriptions
Admin subscriptions list
Look for Find the student subscription.
demo.kutab.unidevs.co/admin/subscriptions
Subscription row action menu
Look for Open subscription details.
demo.kutab.unidevs.co/admin/subscriptions/1
Subscription detail with class schedule
Look for Schedule rules live on the subscription.
Admin > Lectures

Review lectures and lecture details

Audit classes across upcoming, past, custom, and all lecture views.

Use when

Use this when support asks about a class, a teacher reports an issue, or an admin needs to confirm status.

Expected outcome

The admin can see the list context and the single lecture detail record with timeline, participants, and quick status.

Steps

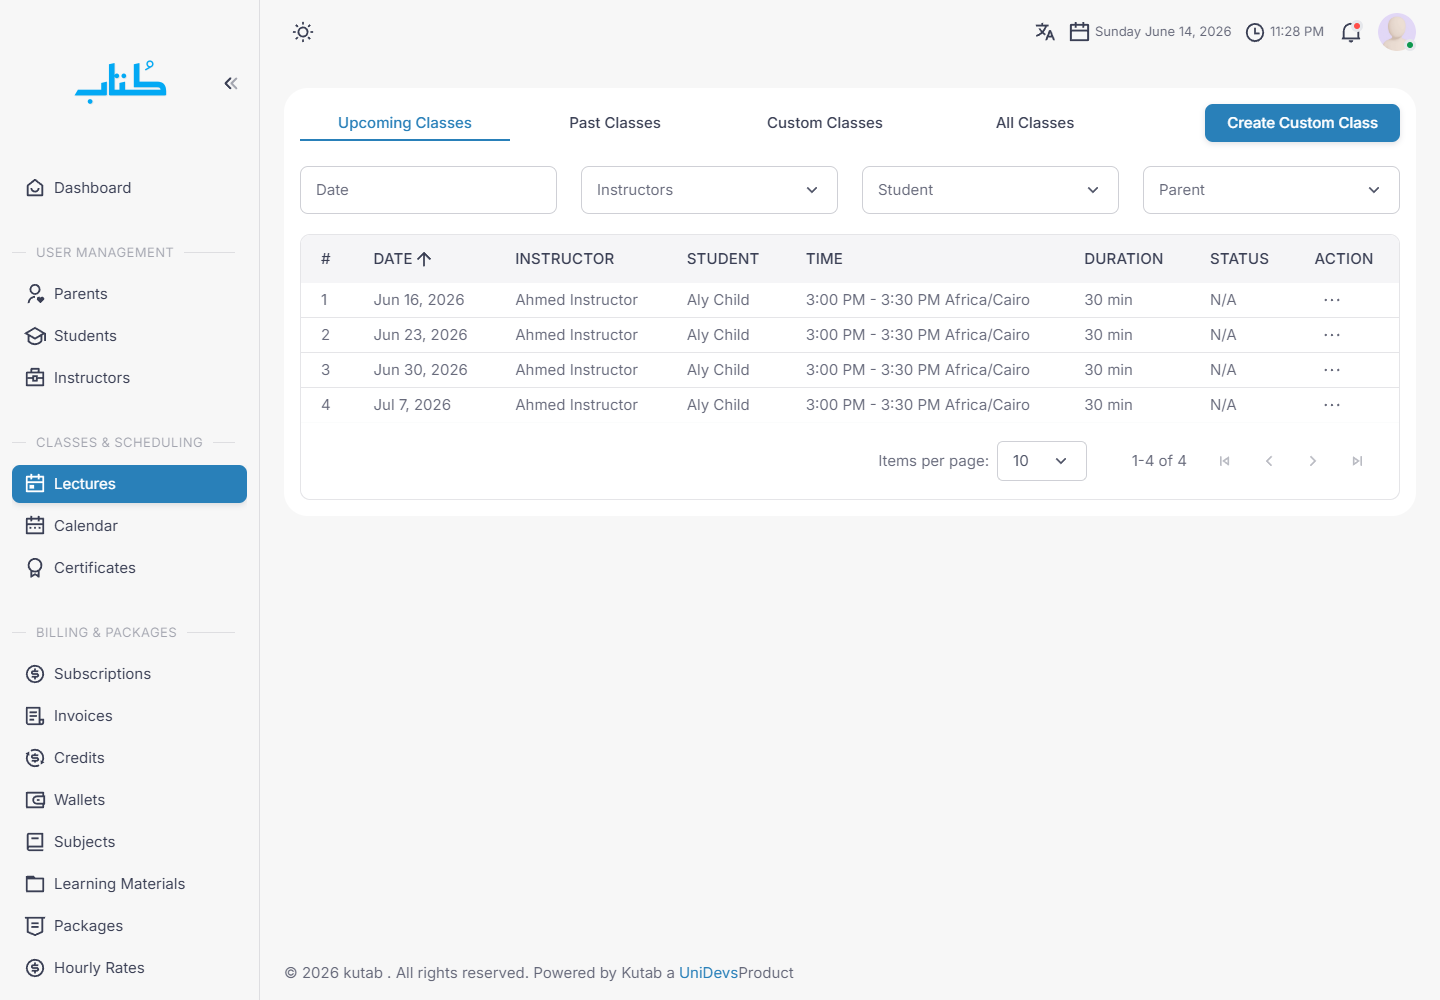
  1. Open Lectures and choose the right tab: Upcoming Classes, Past Classes, Custom Classes, or All Classes.
  2. Filter by date, instructor, student, or parent to narrow the table.
  3. Use the row action menu and choose View details for the exact lecture.
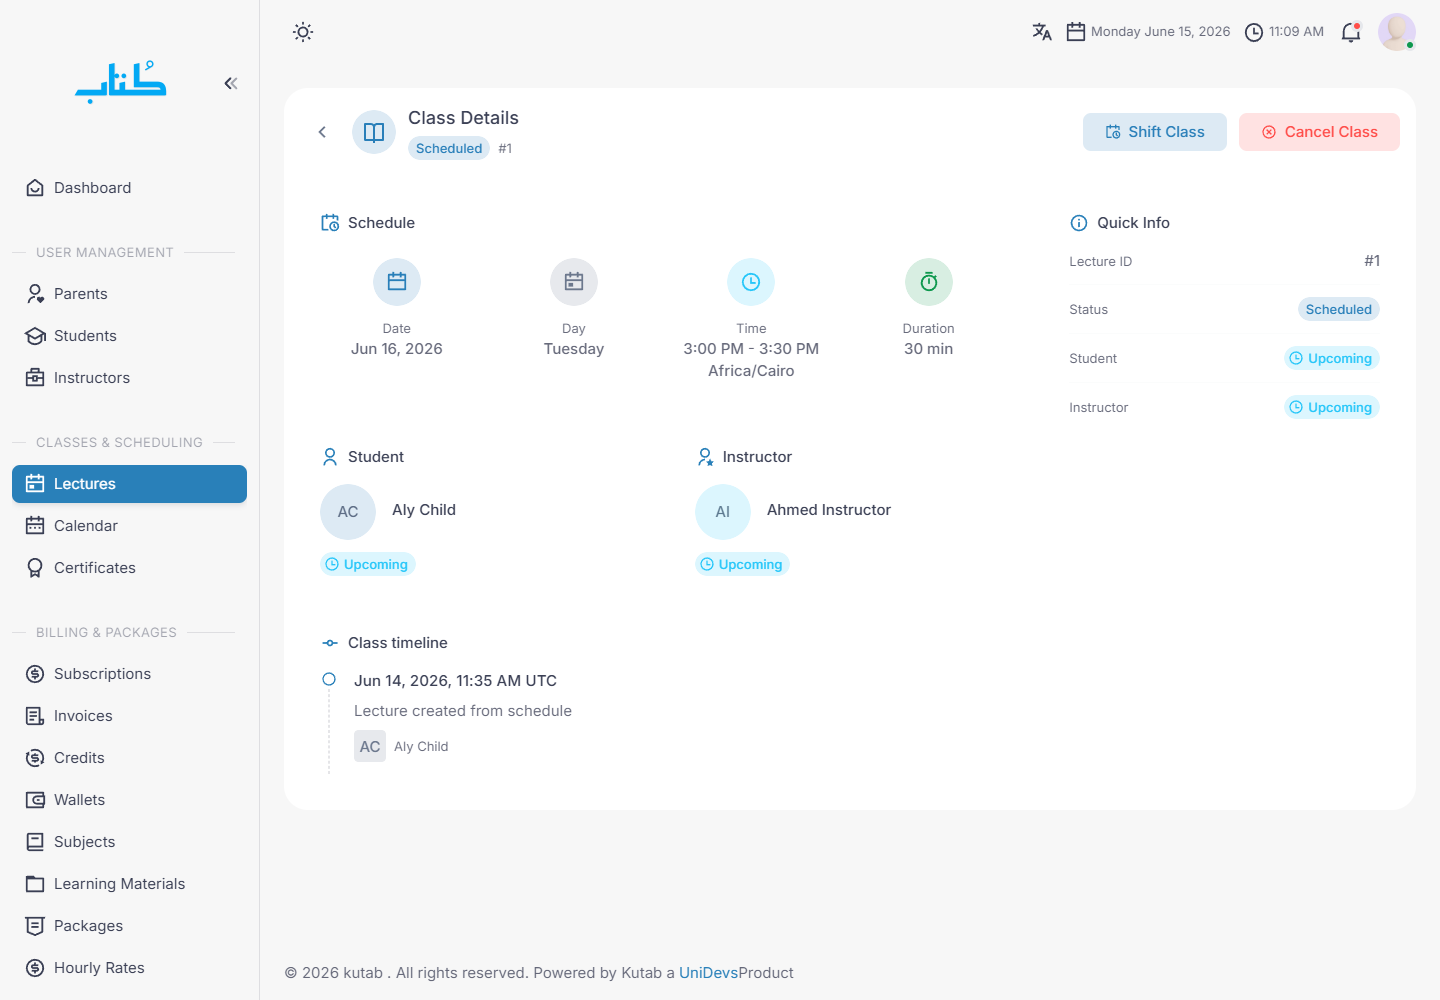
  4. On the lecture details page, check schedule, day, time, duration, student, instructor, status, and timeline events.
  5. Use the detail page actions only after confirming the record is the intended lecture.

Checks

  • The table is for discovery; the details page is the source of truth for one lecture.
  • The timeline helps explain whether the lecture came from a recurring schedule or a custom action.
  • Do not cancel or shift from the table until the date, student, and instructor have been checked.
demo.kutab.unidevs.co/admin/lectures
Admin lectures list with filters and tabs
Look for Use tabs and filters to find the class.
demo.kutab.unidevs.co/admin/lectures/1
Admin lecture details page
Look for Open View details for the single lecture record.
Admin > Lectures > Create Custom Class

Create a custom lecture

Create a one-off class that is not generated from the normal recurring subscription schedule.

Use when

Use this for make-up sessions, trial classes, assessment sessions, onboarding calls, or special workshops.

Expected outcome

A standalone lecture appears in Custom Classes and can be reviewed, shifted, or cancelled like other lectures.

Steps

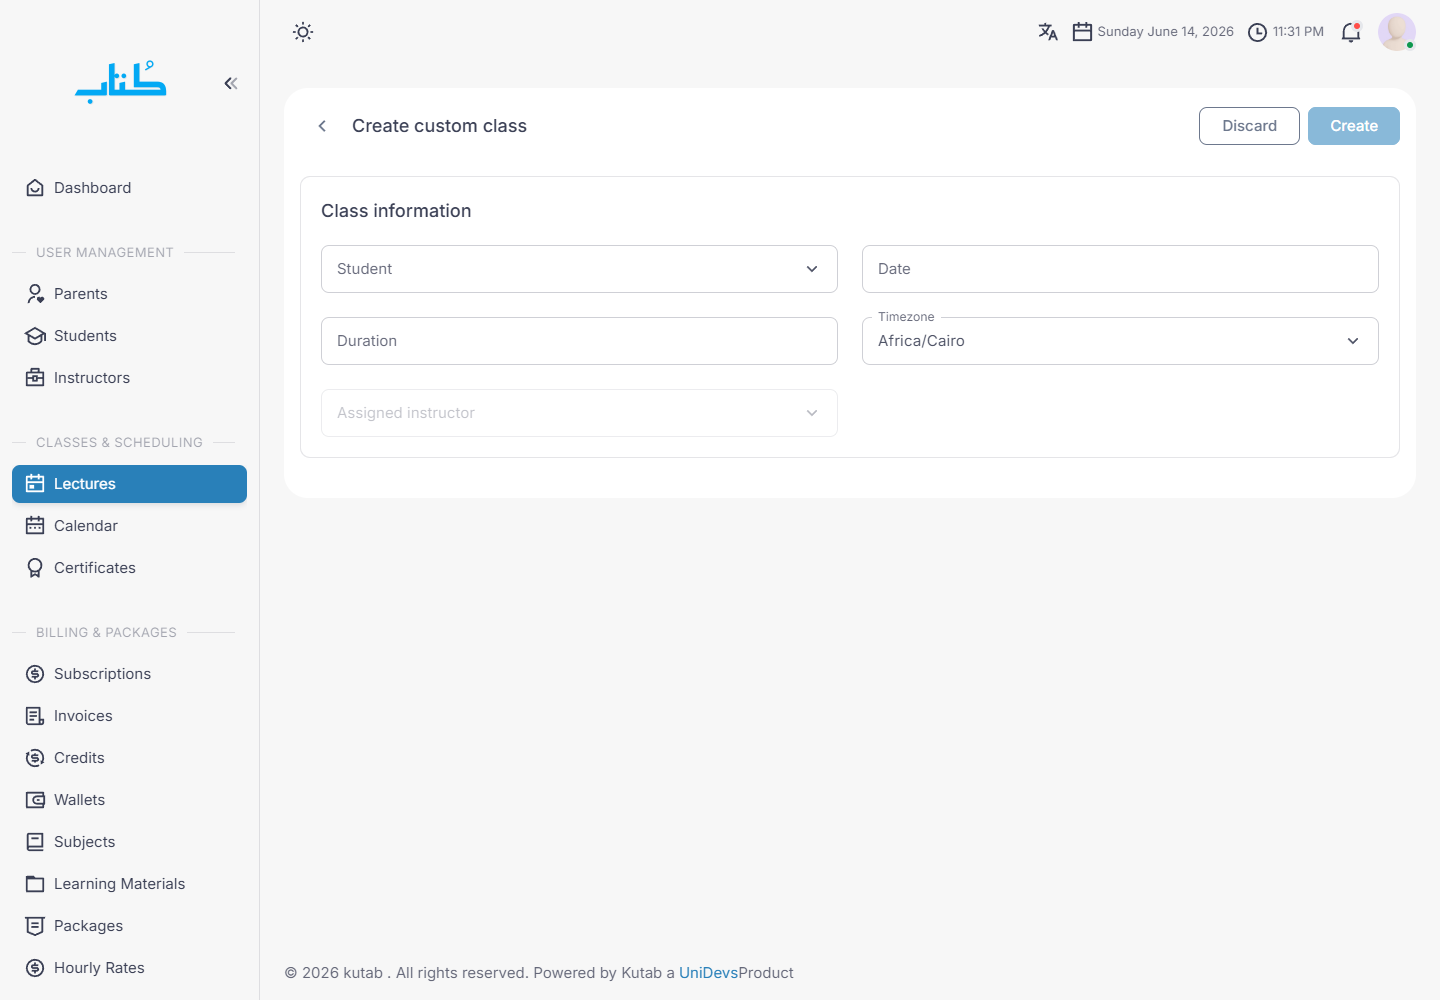
  1. Open Lectures and choose Create Custom Class.
  2. Select the student and instructor. Confirm both are the intended people before choosing the time.
  3. Set date, timezone, start time, end time, and duration. Use the same timezone standard your coordinators use for scheduling.
  4. Add a short description that explains why this class is custom, such as make-up class or trial session.
  5. Submit the class, then return to Lectures and use the Custom Classes tab to confirm it was created.

Checks

  • Use custom lectures for exceptions, not for a student's normal weekly schedule.
  • If the class should repeat, update the subscription schedule instead of creating many custom lectures.
  • Use the description field to make future support review easier.
demo.kutab.unidevs.co/admin/lectures/create-custom-class
Create custom class form
Look for Create a one-off class outside the recurring schedule.
Admin > Lectures > Row actions

Cancel or shift a lecture

Handle schedule changes without losing the operational history of the class.

Use when

Use this when a class cannot happen at its original time or needs to move to a new date.

Expected outcome

The lecture record keeps the action history and the schedule reflects the admin decision.

Steps

  1. Open Lectures and locate the exact class with filters.
  2. Open View details first if there is any doubt about the class record.
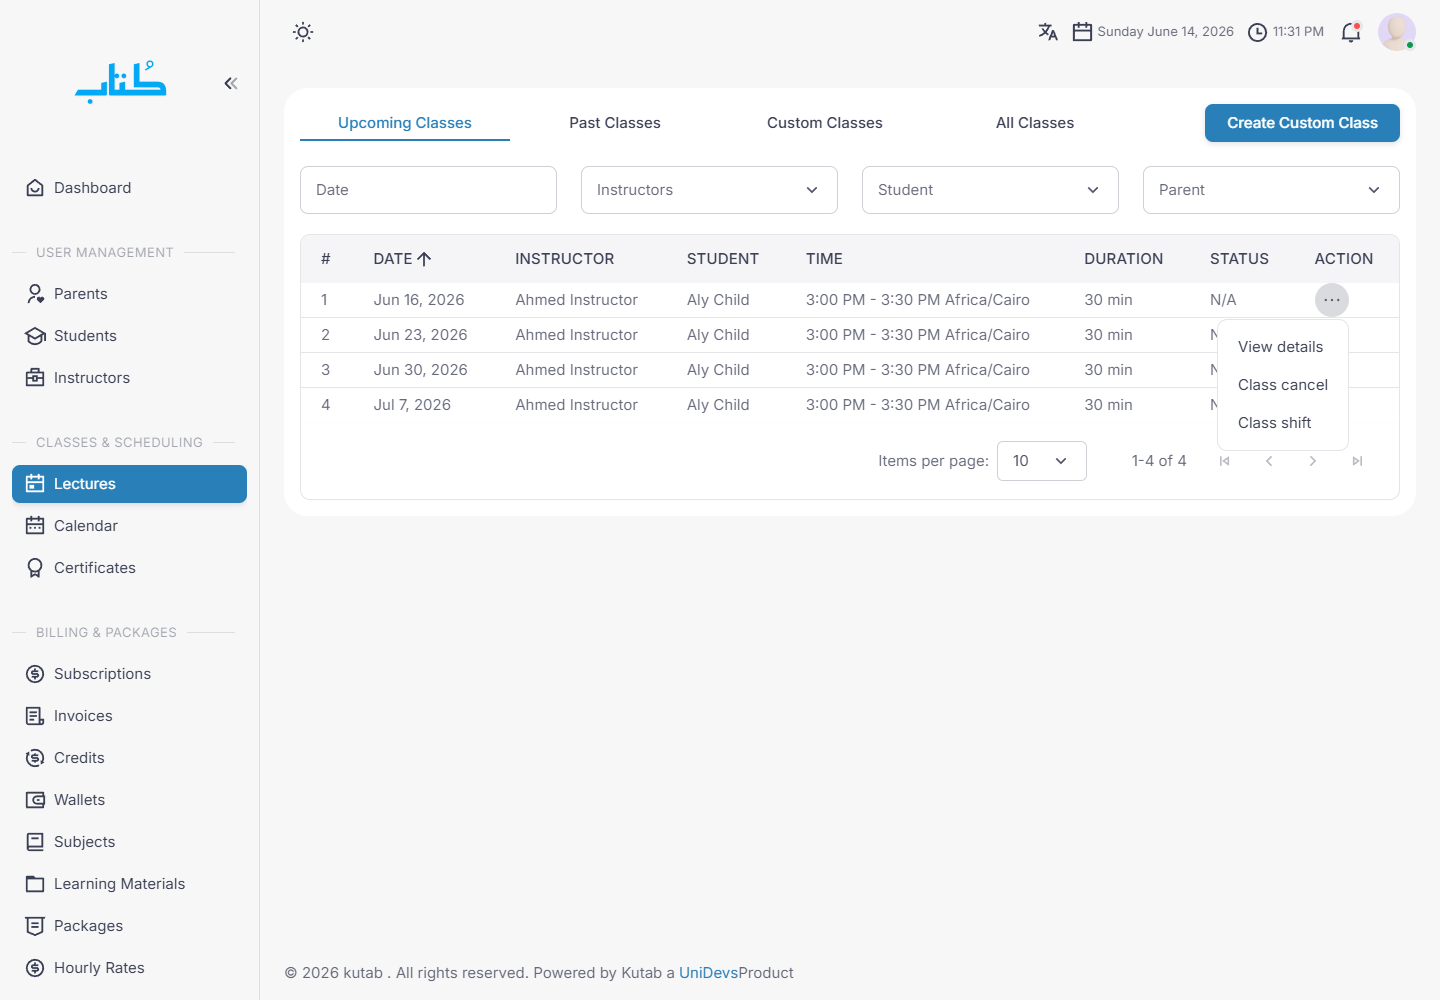
  3. From the row action menu, choose Class cancel when the class should not happen.
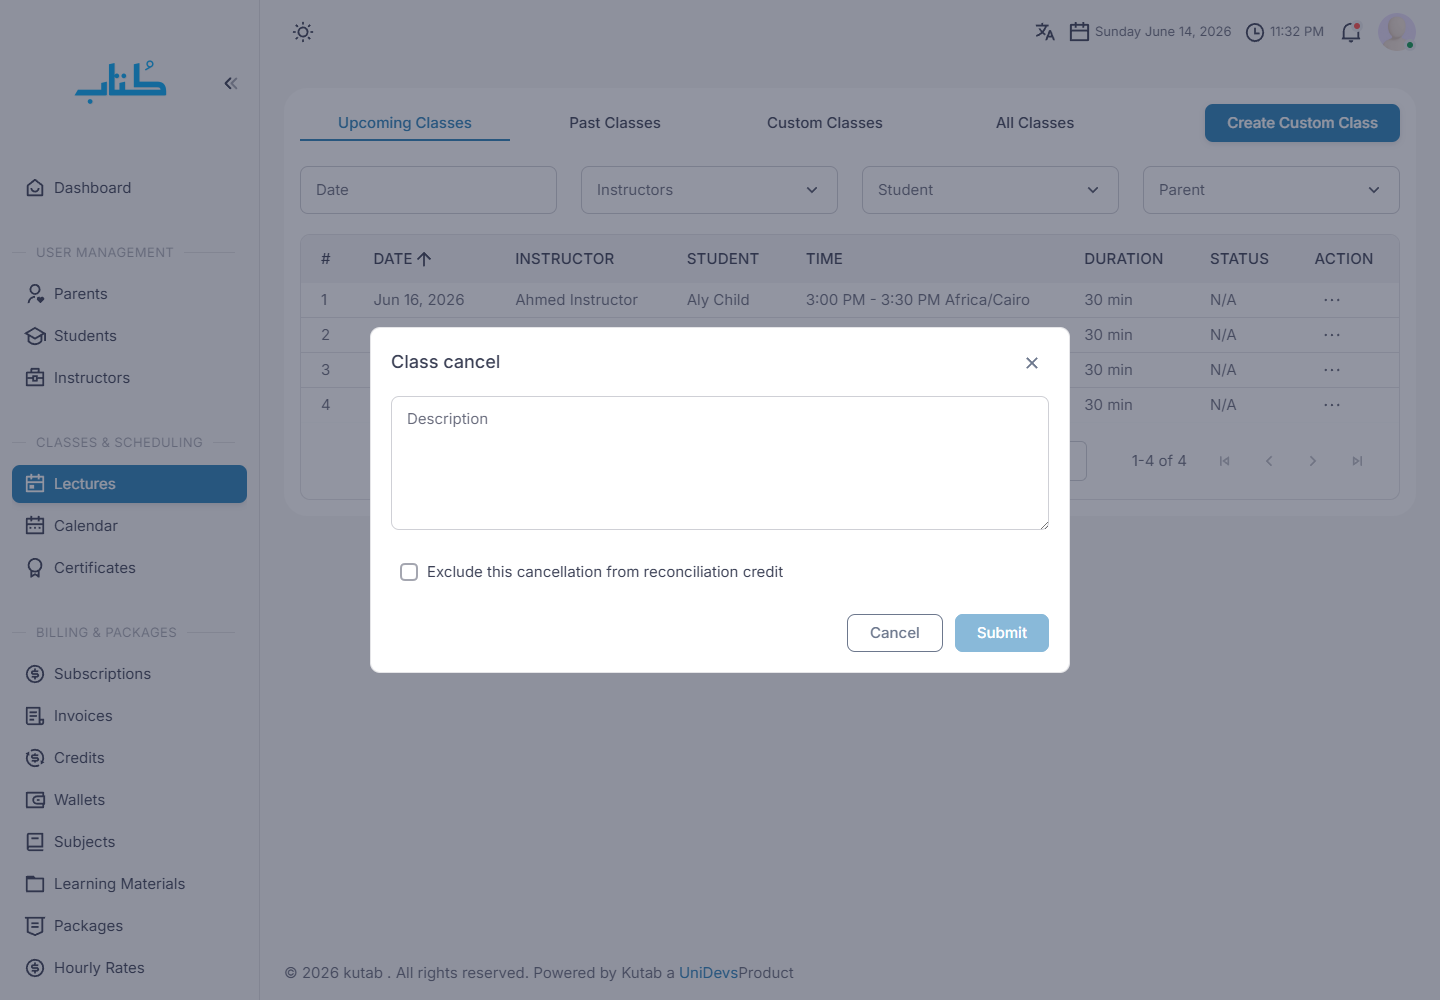
  4. In the cancel dialog, enter the reason and choose whether the cancellation should be excluded from reconciliation credit.
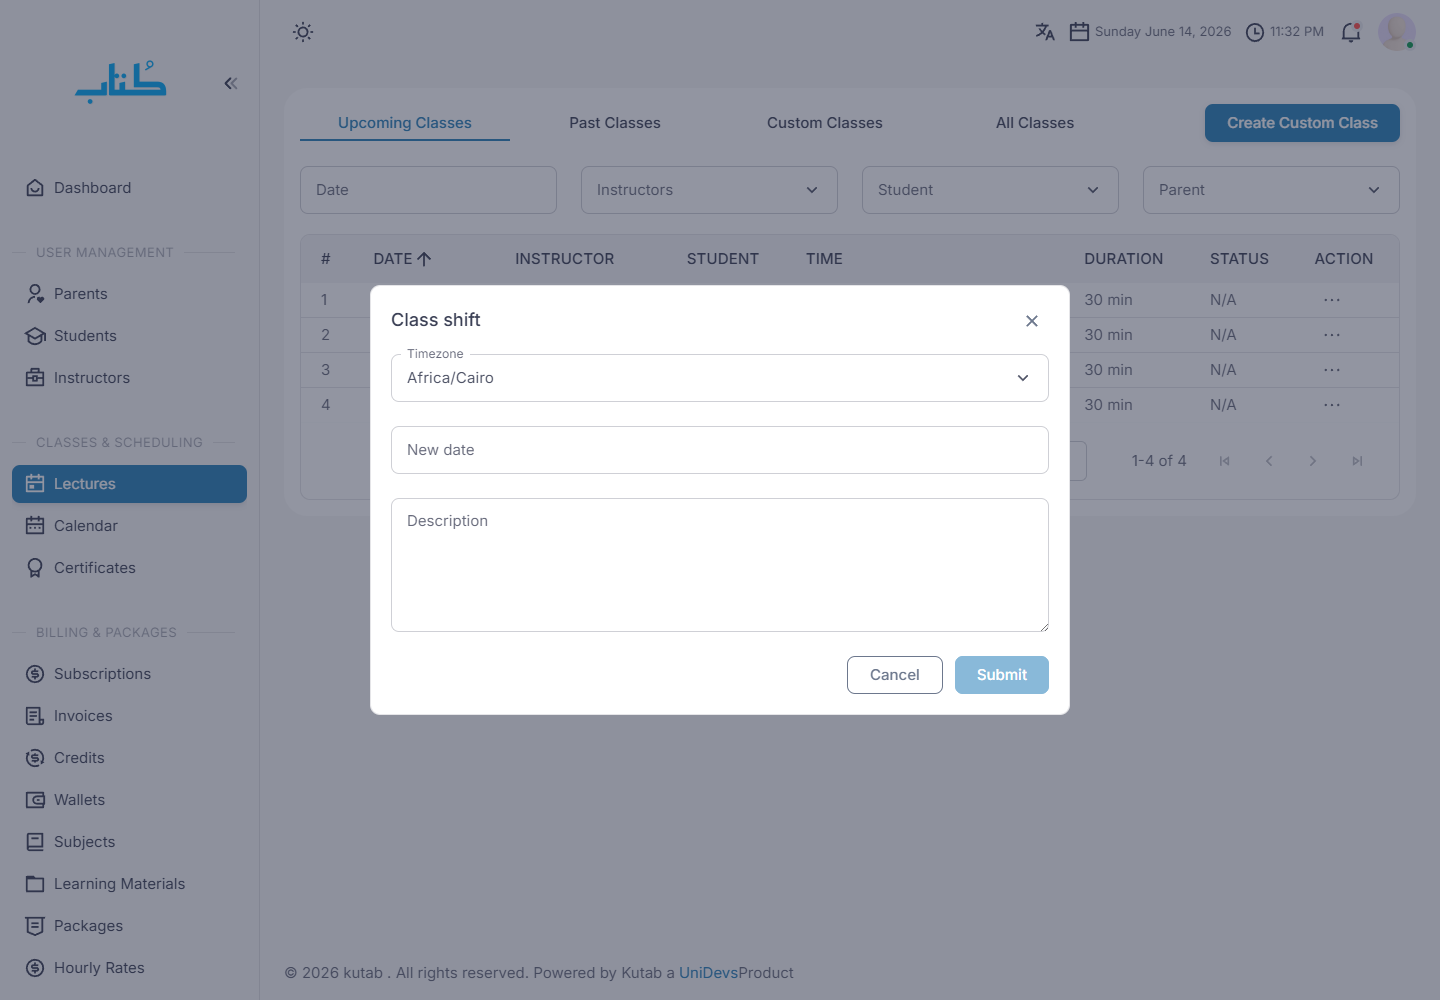
  5. Choose Class shift when the same class should move. Set timezone, new date, and description, then submit.

Checks

  • Cancel means the class will not happen. Shift means the class still happens at a different time.
  • Use the reason fields for support and finance traceability.
  • After shifting, re-open the lecture or calendar to confirm the new date.
demo.kutab.unidevs.co/admin/lectures
Lecture action menu with cancel and shift
Look for Use row actions for operational changes.
demo.kutab.unidevs.co/admin/lectures
Class cancel dialog
Look for Cancel with a reason and credit choice.
demo.kutab.unidevs.co/admin/lectures
Class shift dialog
Look for Shift to a new date with context.
Admin > Learning Materials

Add learning material

Attach study content to the right subject so teachers and learners can find it.

Use when

Use this when adding PDFs, lesson resources, homework files, or subject folders.

Expected outcome

Material is organized under a subject and ready for the relevant teaching workflow.

Steps

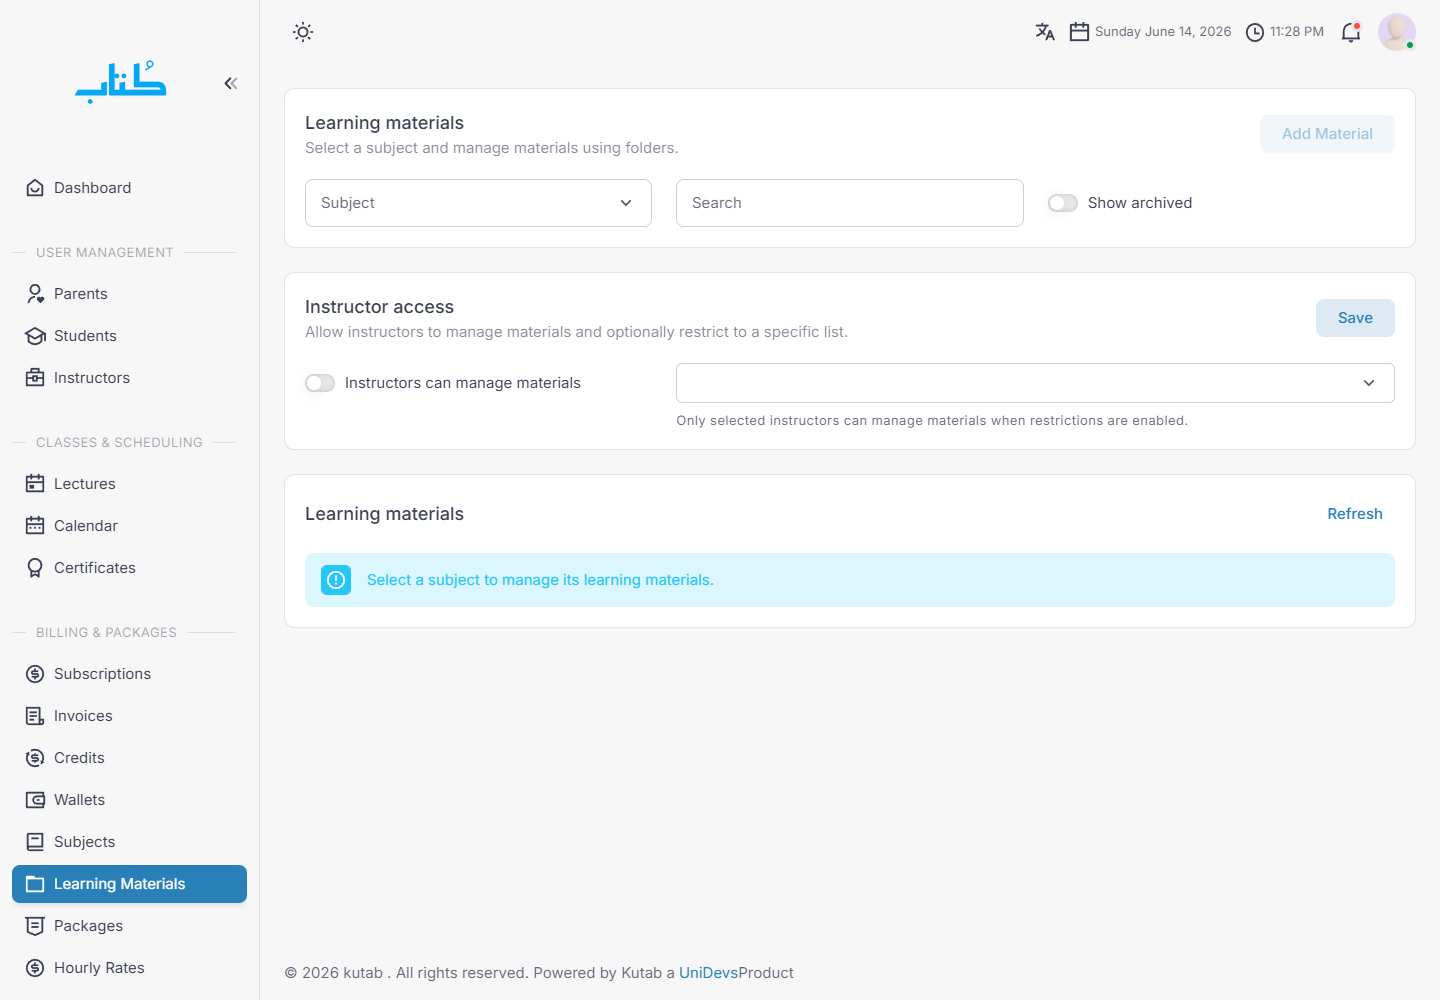
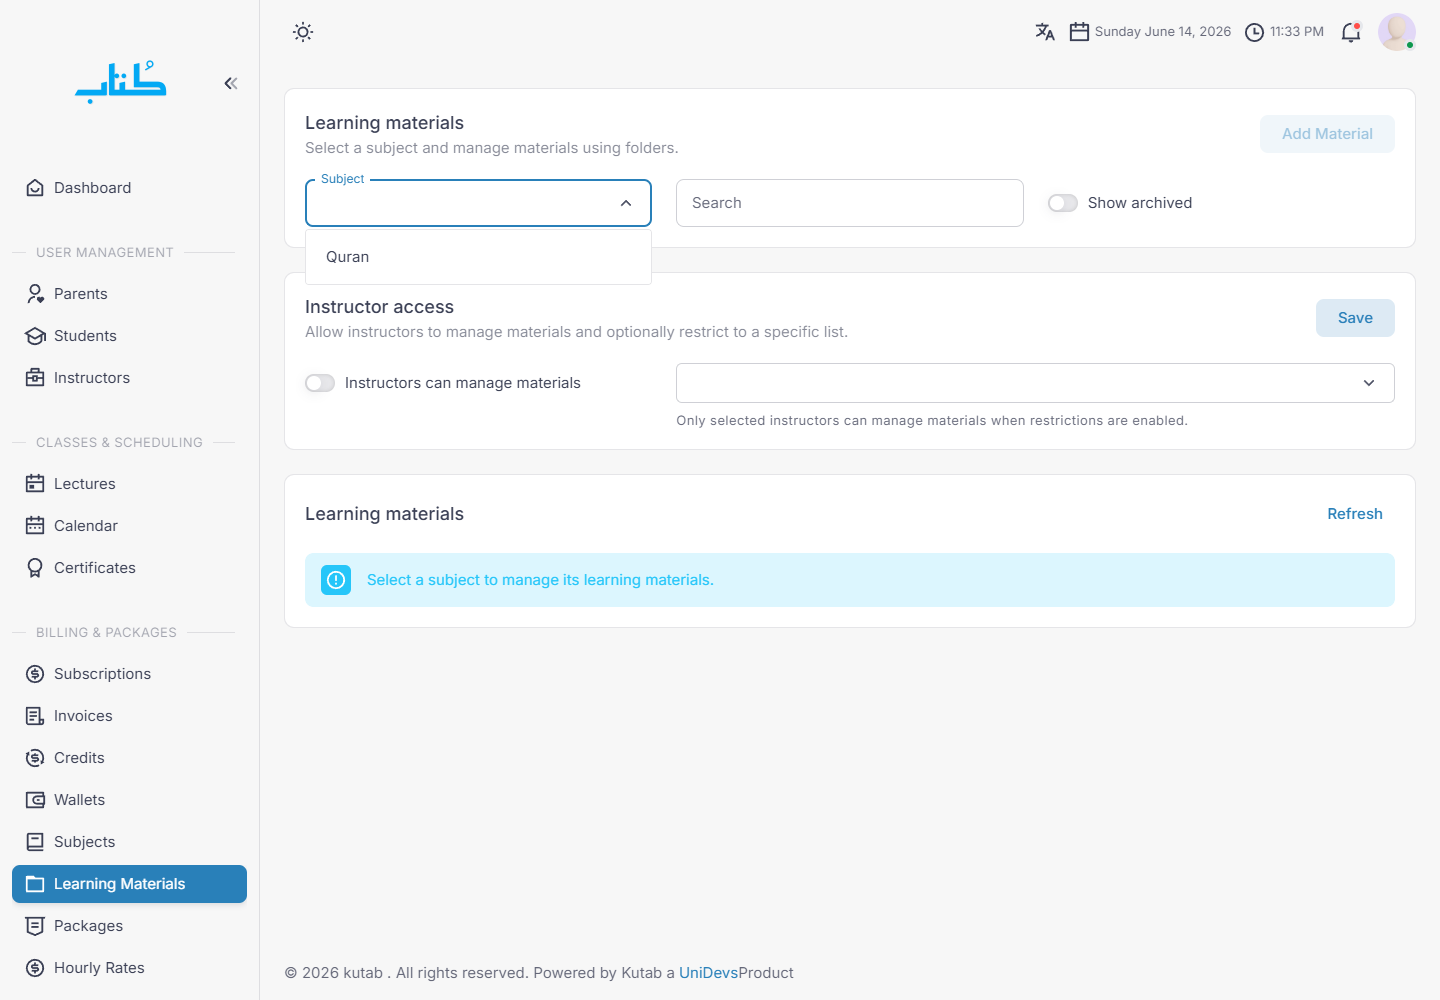
  1. Open Learning Materials. If no subject is selected, the page stays in a waiting state.
  2. Select the subject first. This scopes folders, material lists, and the Add Material action.
  3. Use folders and search to keep the subject library readable.
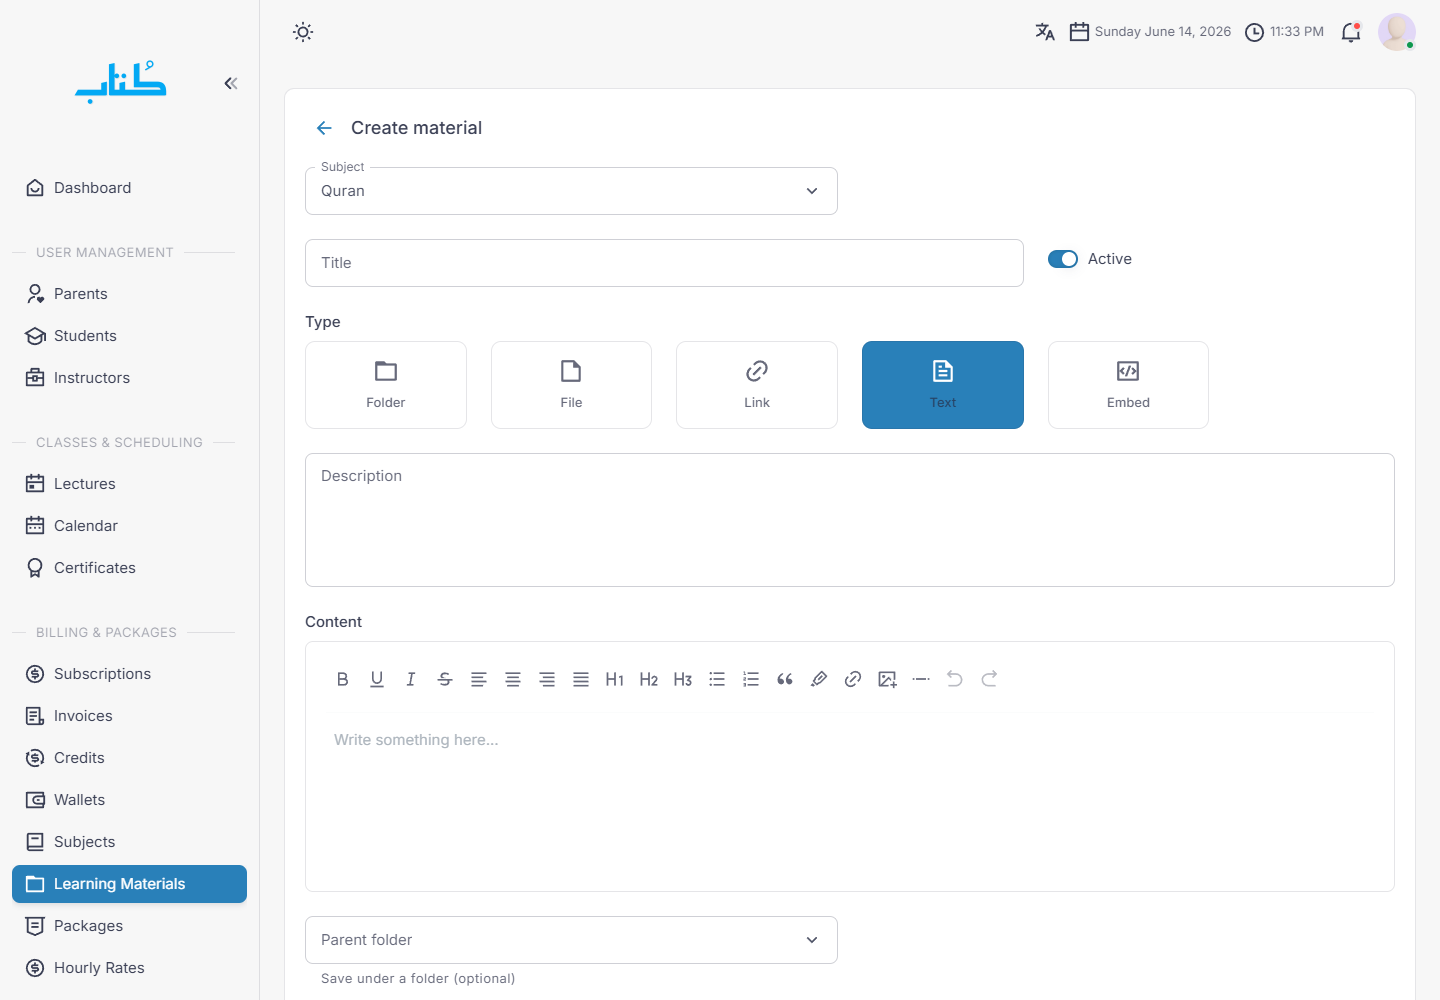
  4. Choose Add Material, enter the material information, attach the file or link, and save.
  5. Use instructor access options when selected instructors should manage or see that material.

Checks

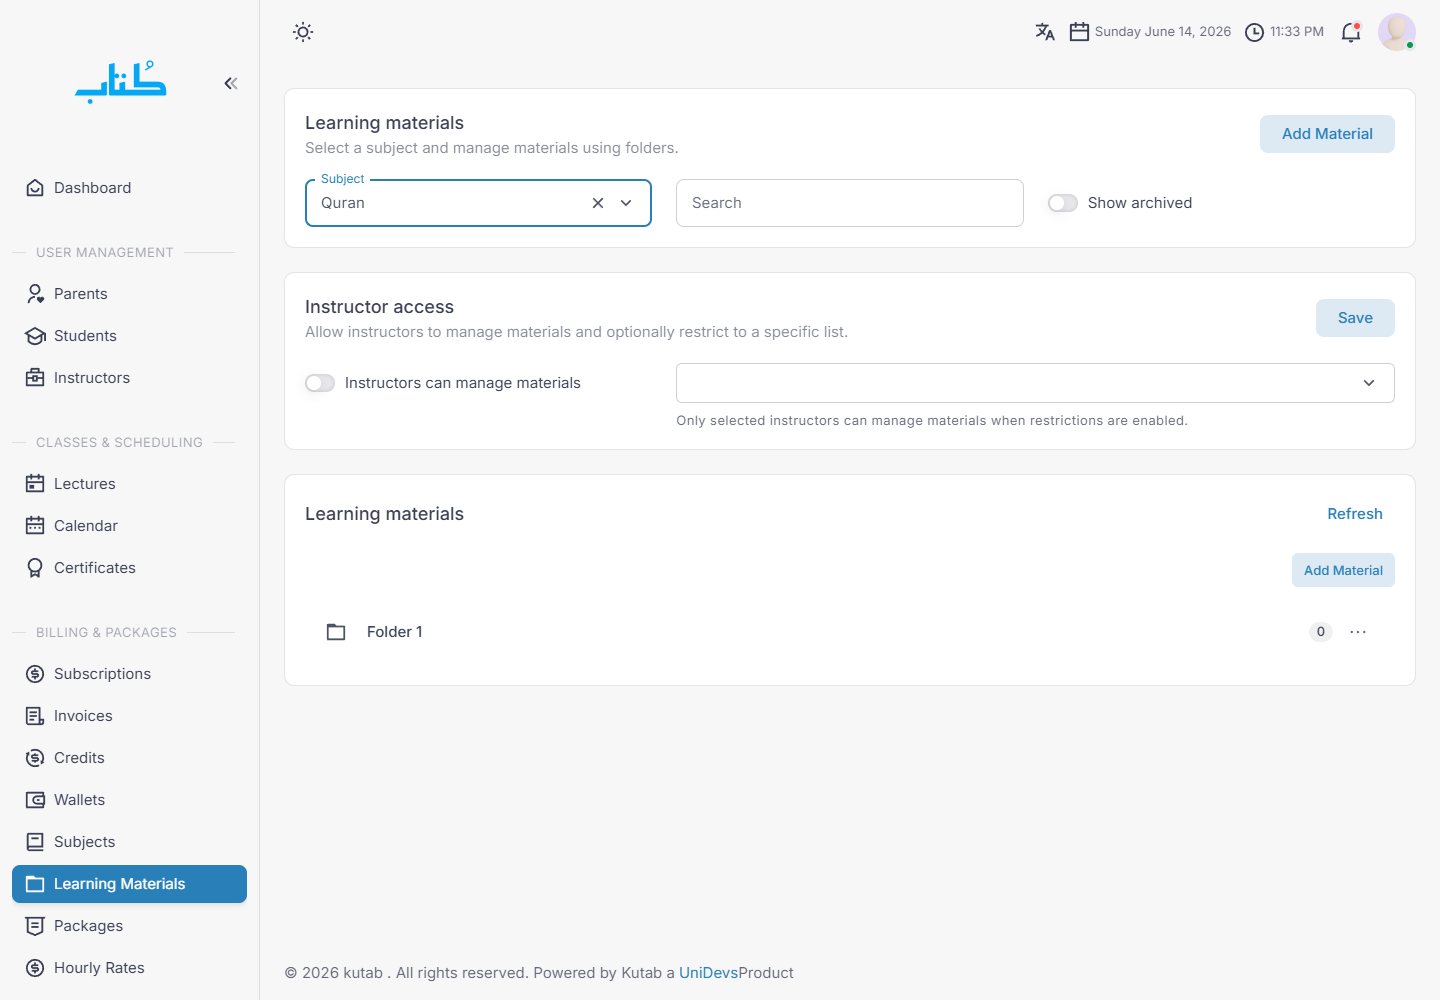
  • If Add Material is unavailable, select a subject first.
  • Name files for the lesson or level, not for the upload date.
  • Keep material under the correct subject so package and class workflows stay clean.
demo.kutab.unidevs.co/admin/learning-materials
Learning materials screen before selecting subject
Look for Select a subject before adding material.
demo.kutab.unidevs.co/admin/learning-materials
Learning materials subject picker
Look for The subject picker scopes the library.
demo.kutab.unidevs.co/admin/learning-materials
Learning materials after selecting a subject
Look for The Add Material action appears after selection.
demo.kutab.unidevs.co/admin/learning-materials
Add learning material form
Look for Add the material details and access rules.
Admin > Admins, then Admin > Roles & Permissions

Manage support team accounts and RBAC

Create internal staff accounts and control what each person can access.

Use when

Use this when onboarding operations, finance, support, or branch staff.

Expected outcome

Each staff member has an admin account with a role that matches their responsibility.

Steps

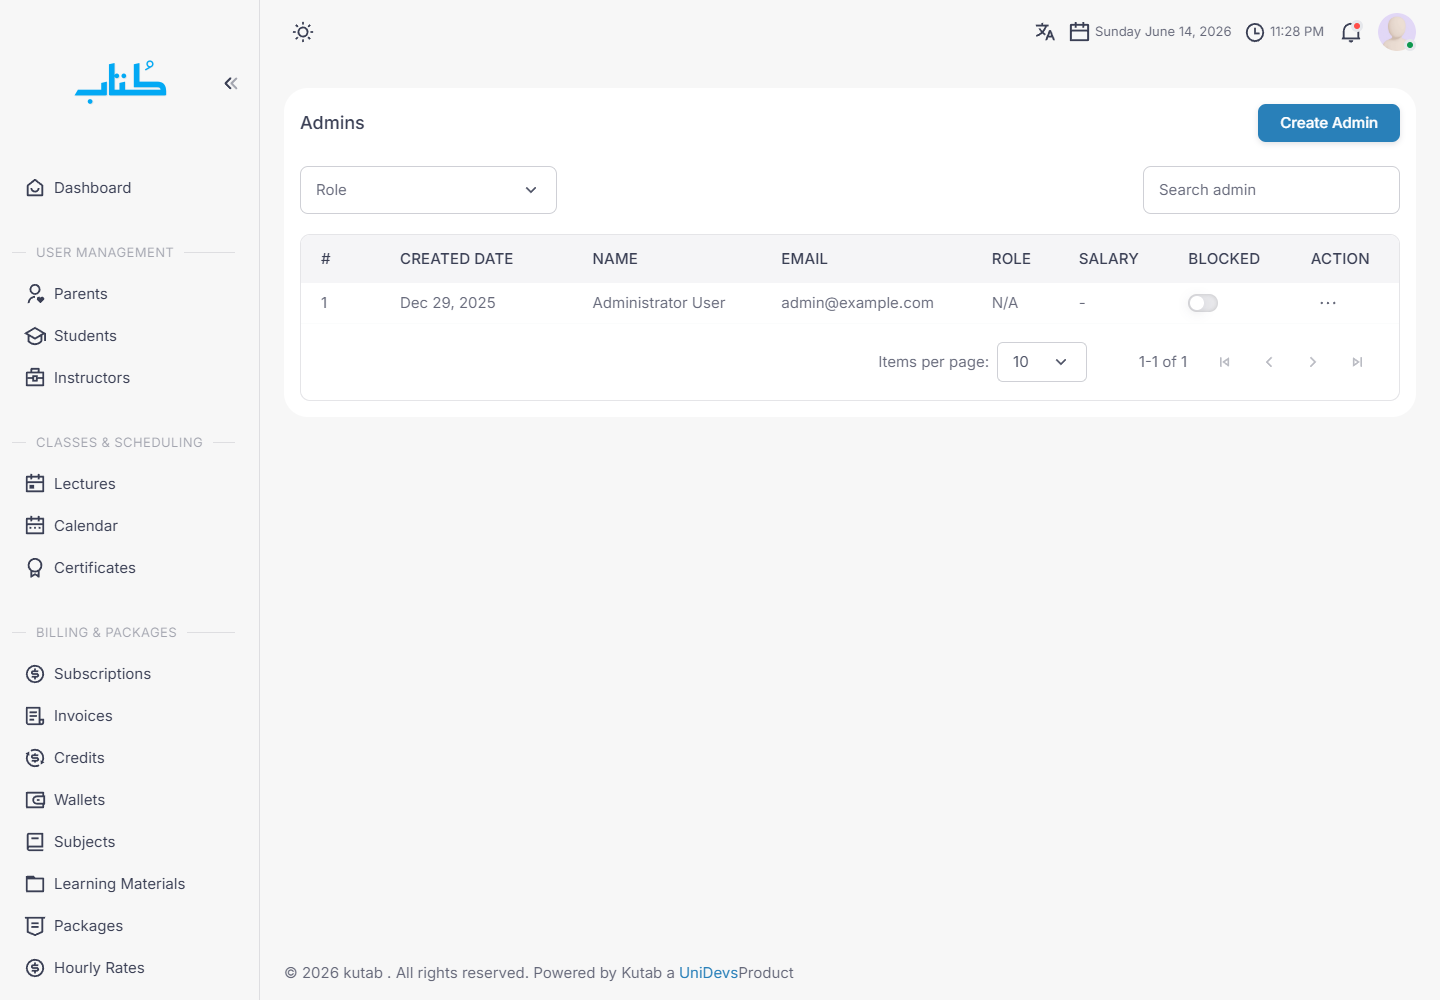
  1. Open Admins to review internal staff accounts.
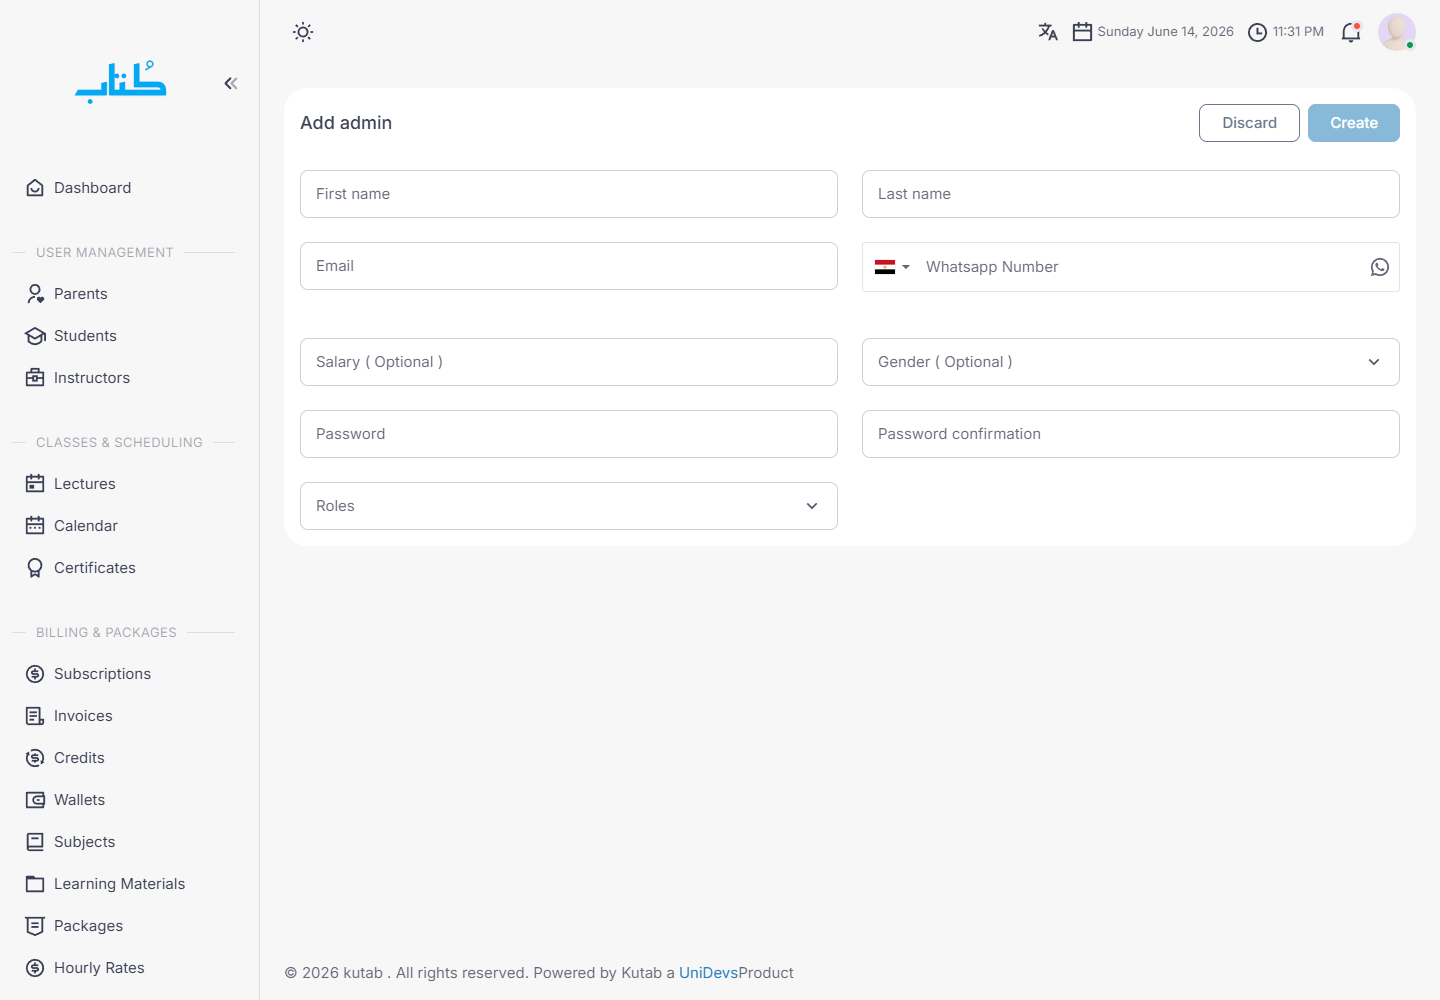
  2. Create the admin account with name, email, and assigned role.
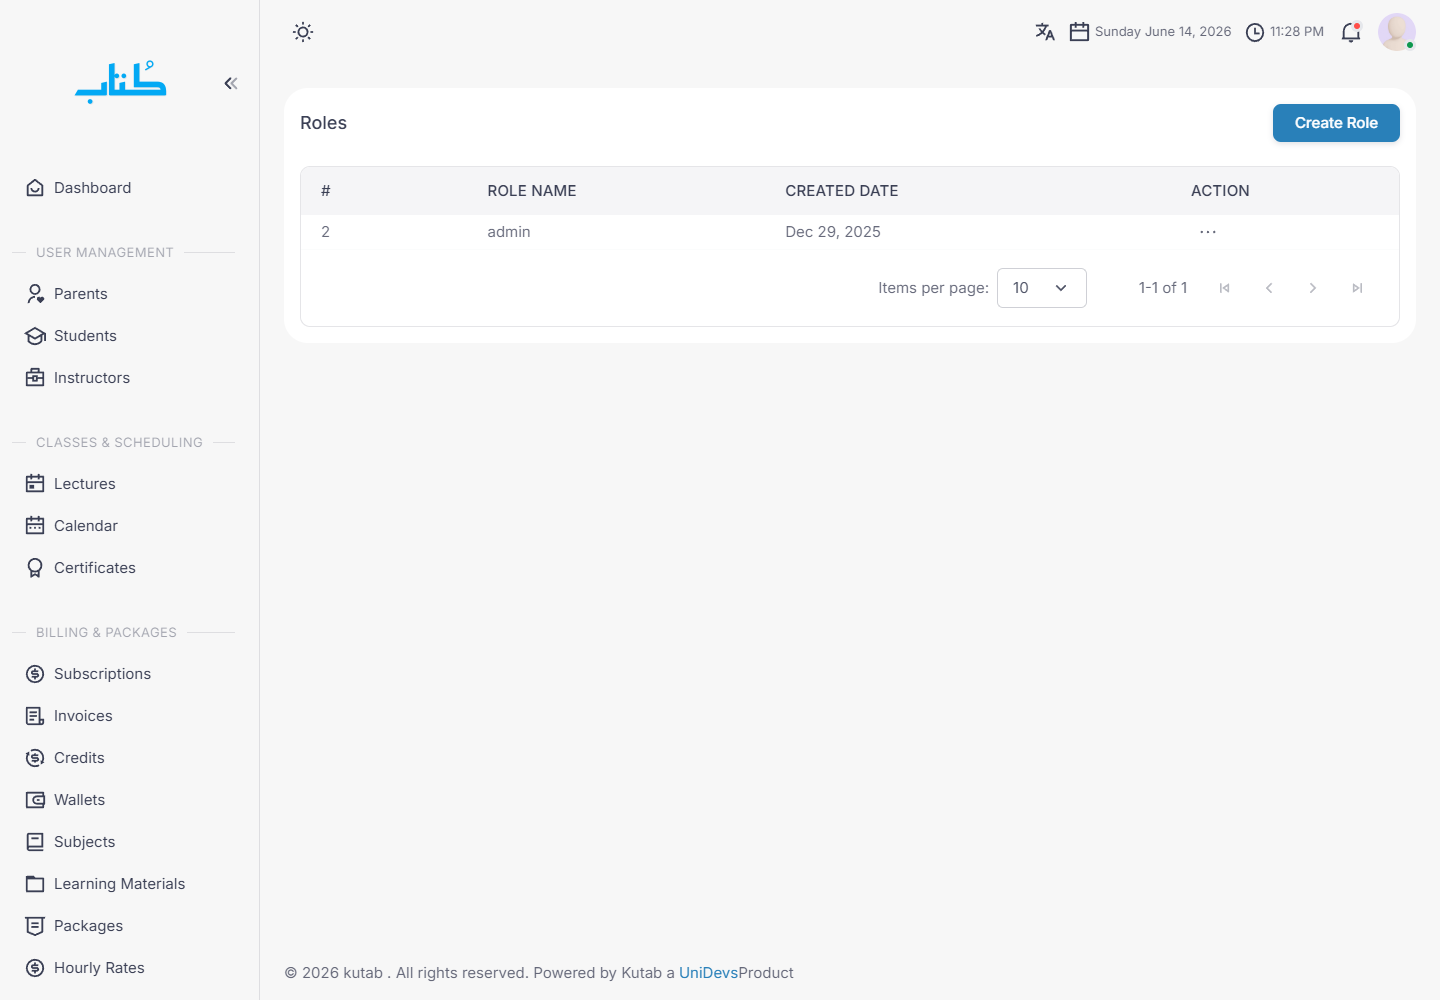
  3. Open Roles & Permissions to review what each role can do.
  4. Create or edit a role and grant only the permissions needed for that team responsibility.
  5. Return to Admins and confirm the staff account is assigned to the correct role.

Checks

  • Create roles before assigning staff if the existing roles are too broad.
  • Keep finance, support, scheduling, and super-admin permissions separate.
  • Review role permissions after staff responsibility changes.
demo.kutab.unidevs.co/admin/admins
Admins list
Look for Internal staff accounts live under Admins.
demo.kutab.unidevs.co/admin/admins/create
Create admin account form
Look for Assign a role during account creation.
demo.kutab.unidevs.co/admin/roles
Roles and permissions list
Look for Roles define access boundaries.
demo.kutab.unidevs.co/admin/roles/create
Create role permissions form
Look for Grant only the permissions needed.
Admin > Notification Editor and Admin > Custom Notifications

Edit notifications

Control automated notification templates and one-off messages.

Use when

Use this when class, billing, account, or support messages need better wording or targeting.

Expected outcome

System templates stay consistent, and custom messages reach the intended audience.

Steps

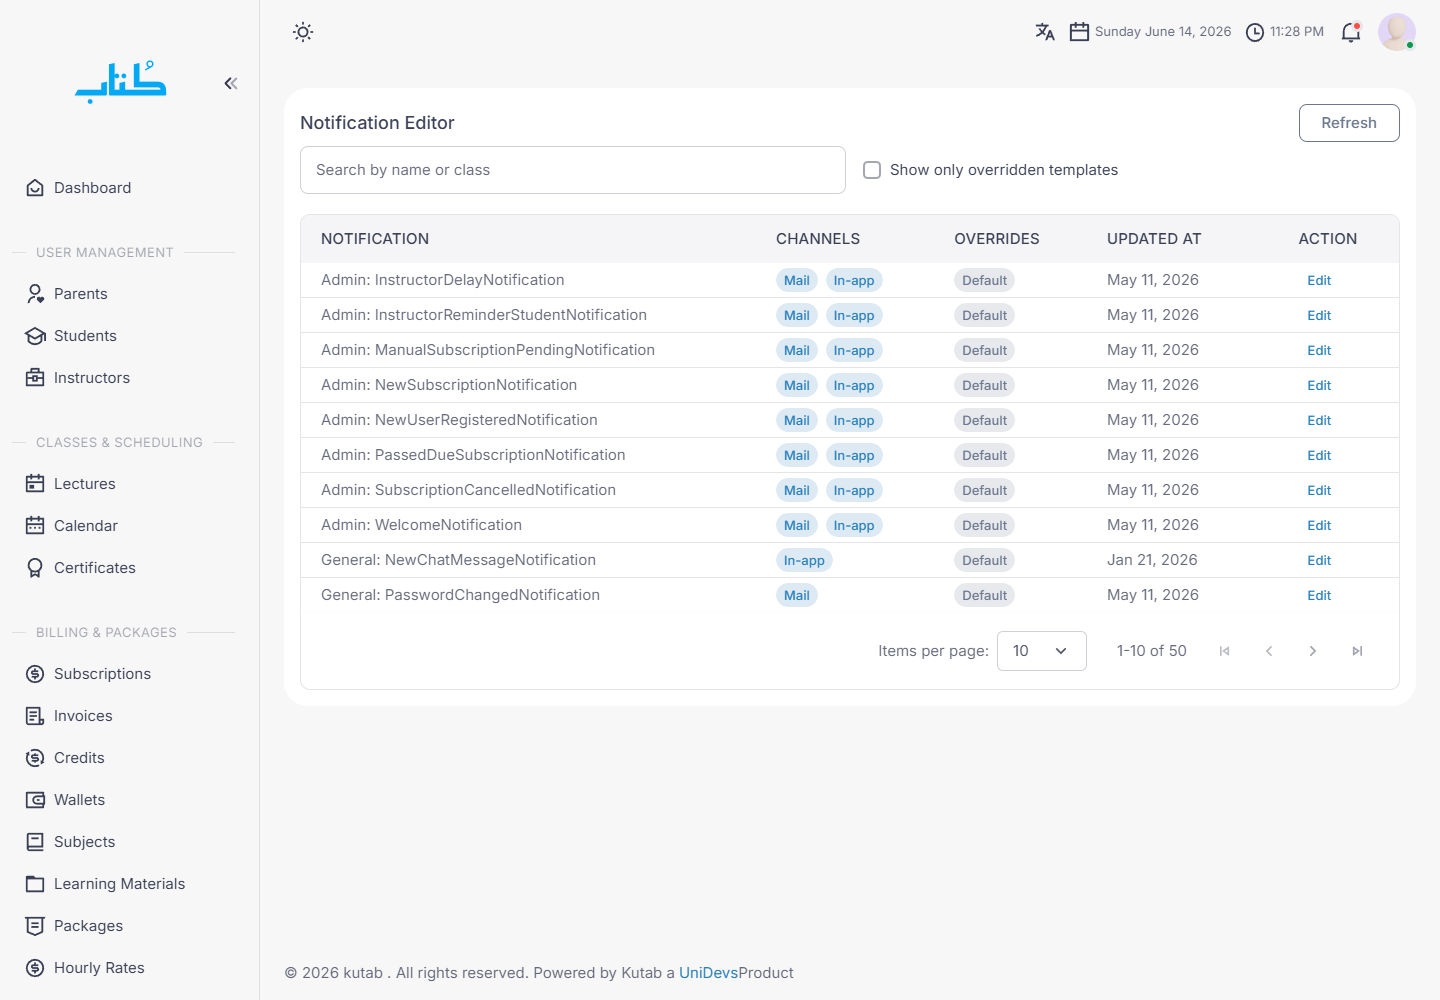
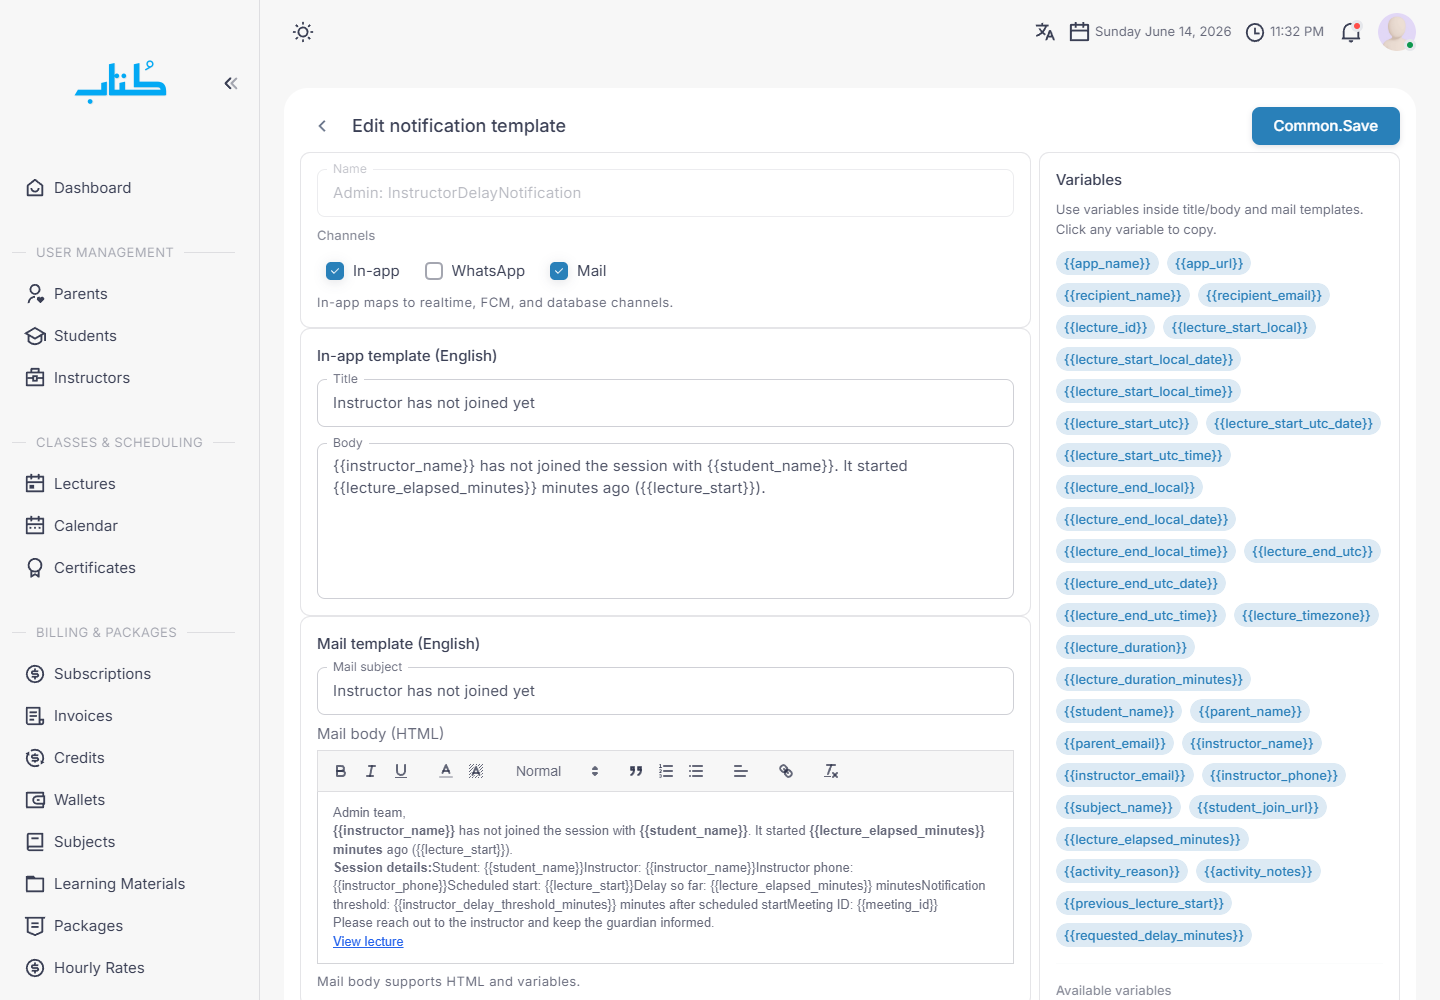
  1. Open Notification Editor to review automated templates.
  2. Edit a template when system-generated messages need different subject, body, channel, or placeholder use.
  3. Keep placeholders intact unless you are sure the template no longer needs that dynamic value.
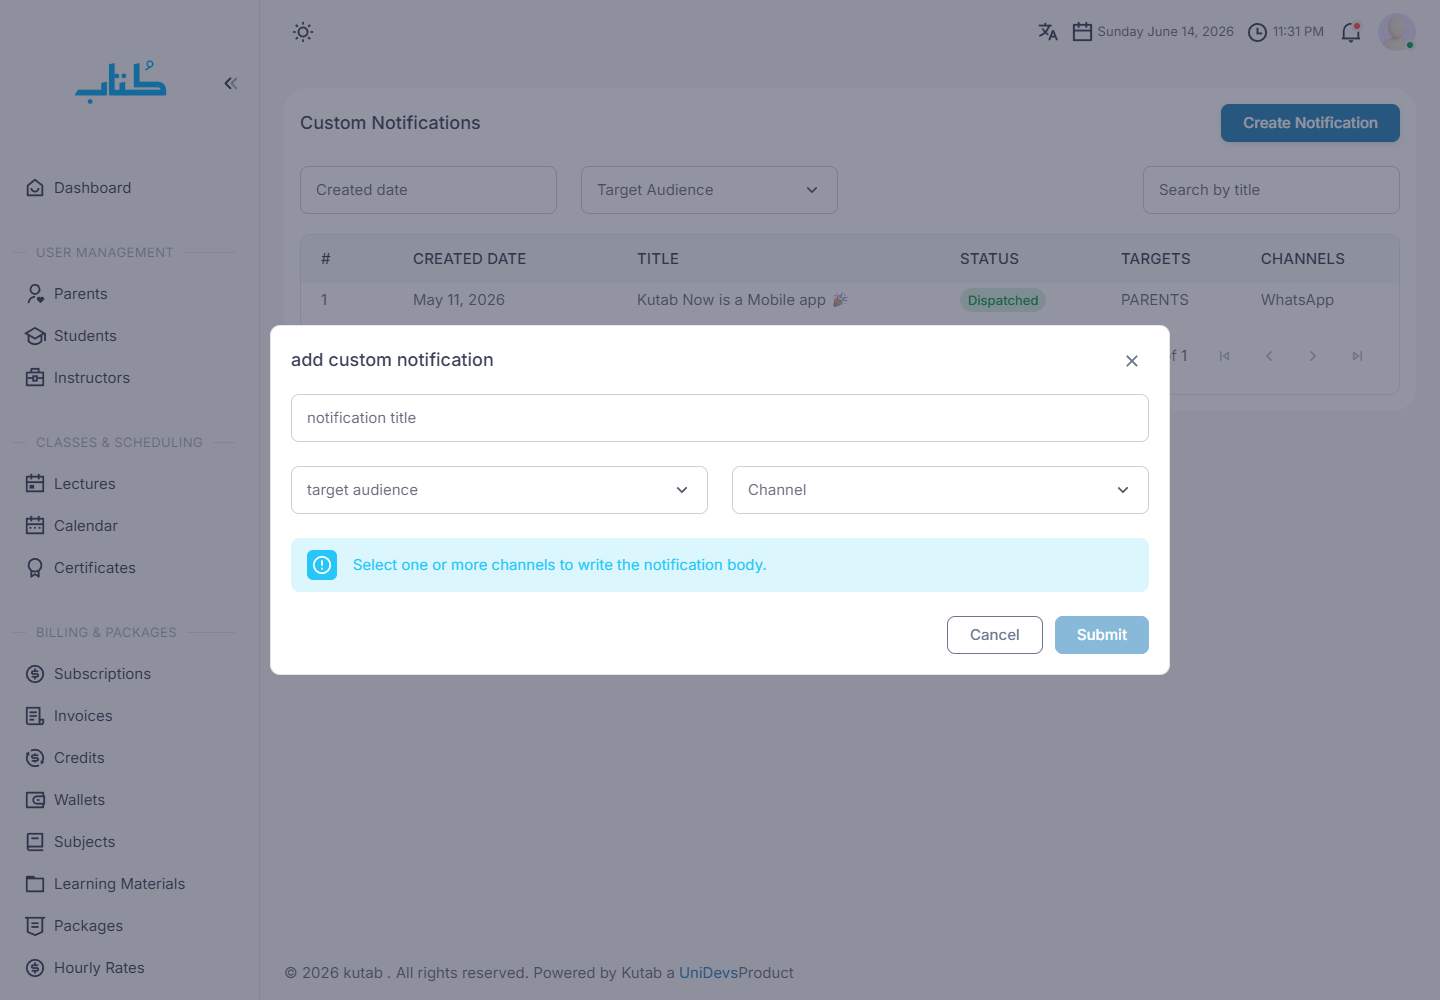
  4. Open Custom Notifications when you need to send a one-off message.
  5. Select the audience, write the message, review it, and submit.

Checks

  • Template edits affect future automated messages.
  • Custom notifications are for ad-hoc communication, not system behavior.
  • Test placeholder-heavy templates carefully so messages do not send with missing values.
demo.kutab.unidevs.co/admin/notification-templates
Notification templates list
Look for Review automated templates.
demo.kutab.unidevs.co/admin/notification-templates/1
Notification template edit page
Look for Edit channels, subject, and body.
demo.kutab.unidevs.co/admin/custom-notifications
Create custom notification dialog
Look for Send one-off messages to an audience.
Admin > Holidays

Manage holidays

Block academy dates so teams can plan around unavailable teaching days.

Use when

Use this before generating schedules for public holidays, academy breaks, or planned closures.

Expected outcome

Admins have a visible holiday record that scheduling and operations can reference.

Steps

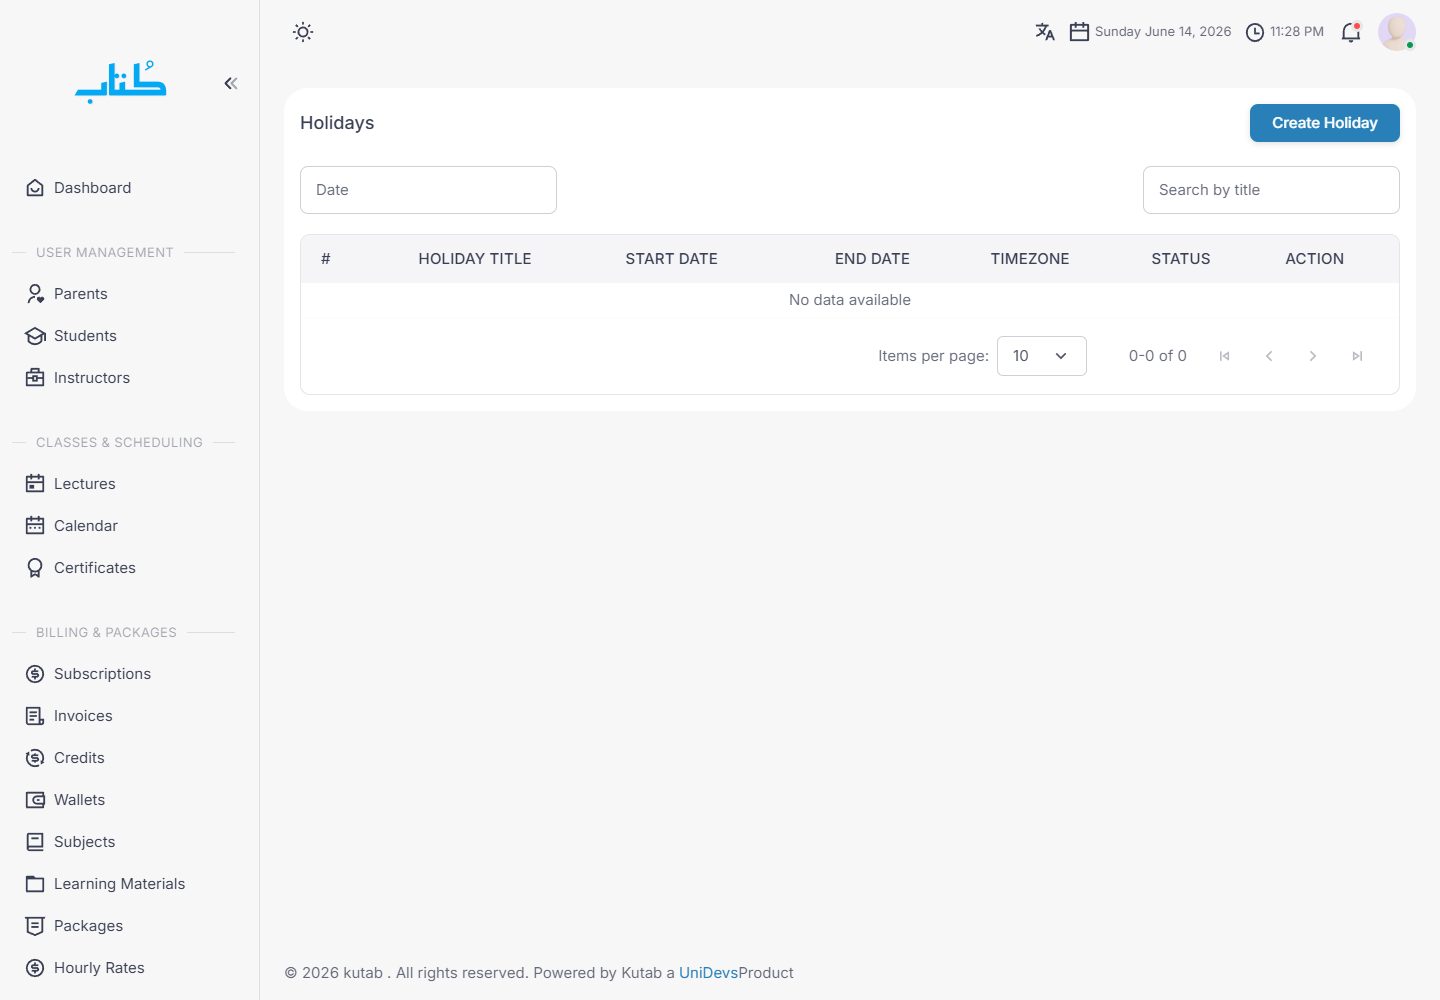
  1. Open Holidays and review existing dates before adding a new one.
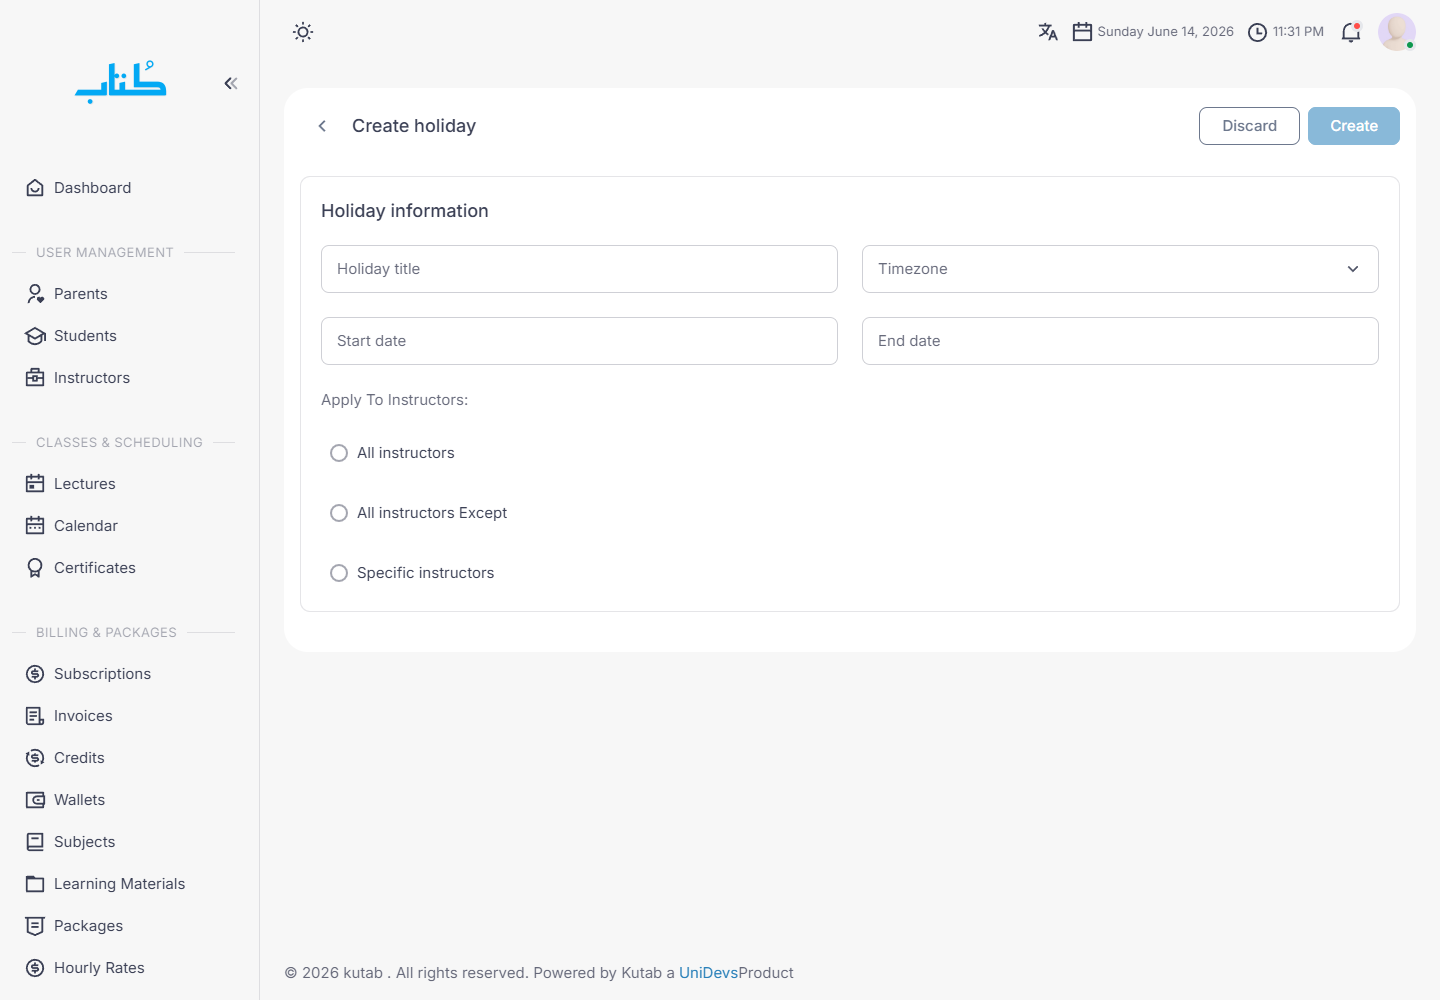
  2. Create a holiday with a clear name, date or date range, and description.
  3. Save the holiday before generating or resetting schedules that should account for the closure.
  4. Review upcoming schedules after major holiday changes to confirm affected classes are handled.

Checks

  • Add holidays early, before coordinators create schedules for that period.
  • Use descriptions for local context, such as branch closure or national holiday.
  • After editing holidays, review subscription schedules if the change affects active students.
demo.kutab.unidevs.co/admin/holidays
Admin holidays list
Look for Review existing closures.
demo.kutab.unidevs.co/admin/holidays/create
Create holiday form
Look for Create a clear holiday record.